# [Service Provider] How to use Node.js Skeleton
This section instructs how to integrate serviceX as a Service Provider. In this page, we employ Skeleton model (Node.js).
Here is the Skeleton repository: https://github.com/credify-pte-ltd/serviceX-service-provider-skeleton-nodejs.
# 0. Preparation
If you have not set up a Service Provider yet, please refer to Getting started - Set up.
Please make sure that you have your product registered on serviceX and approved offers.
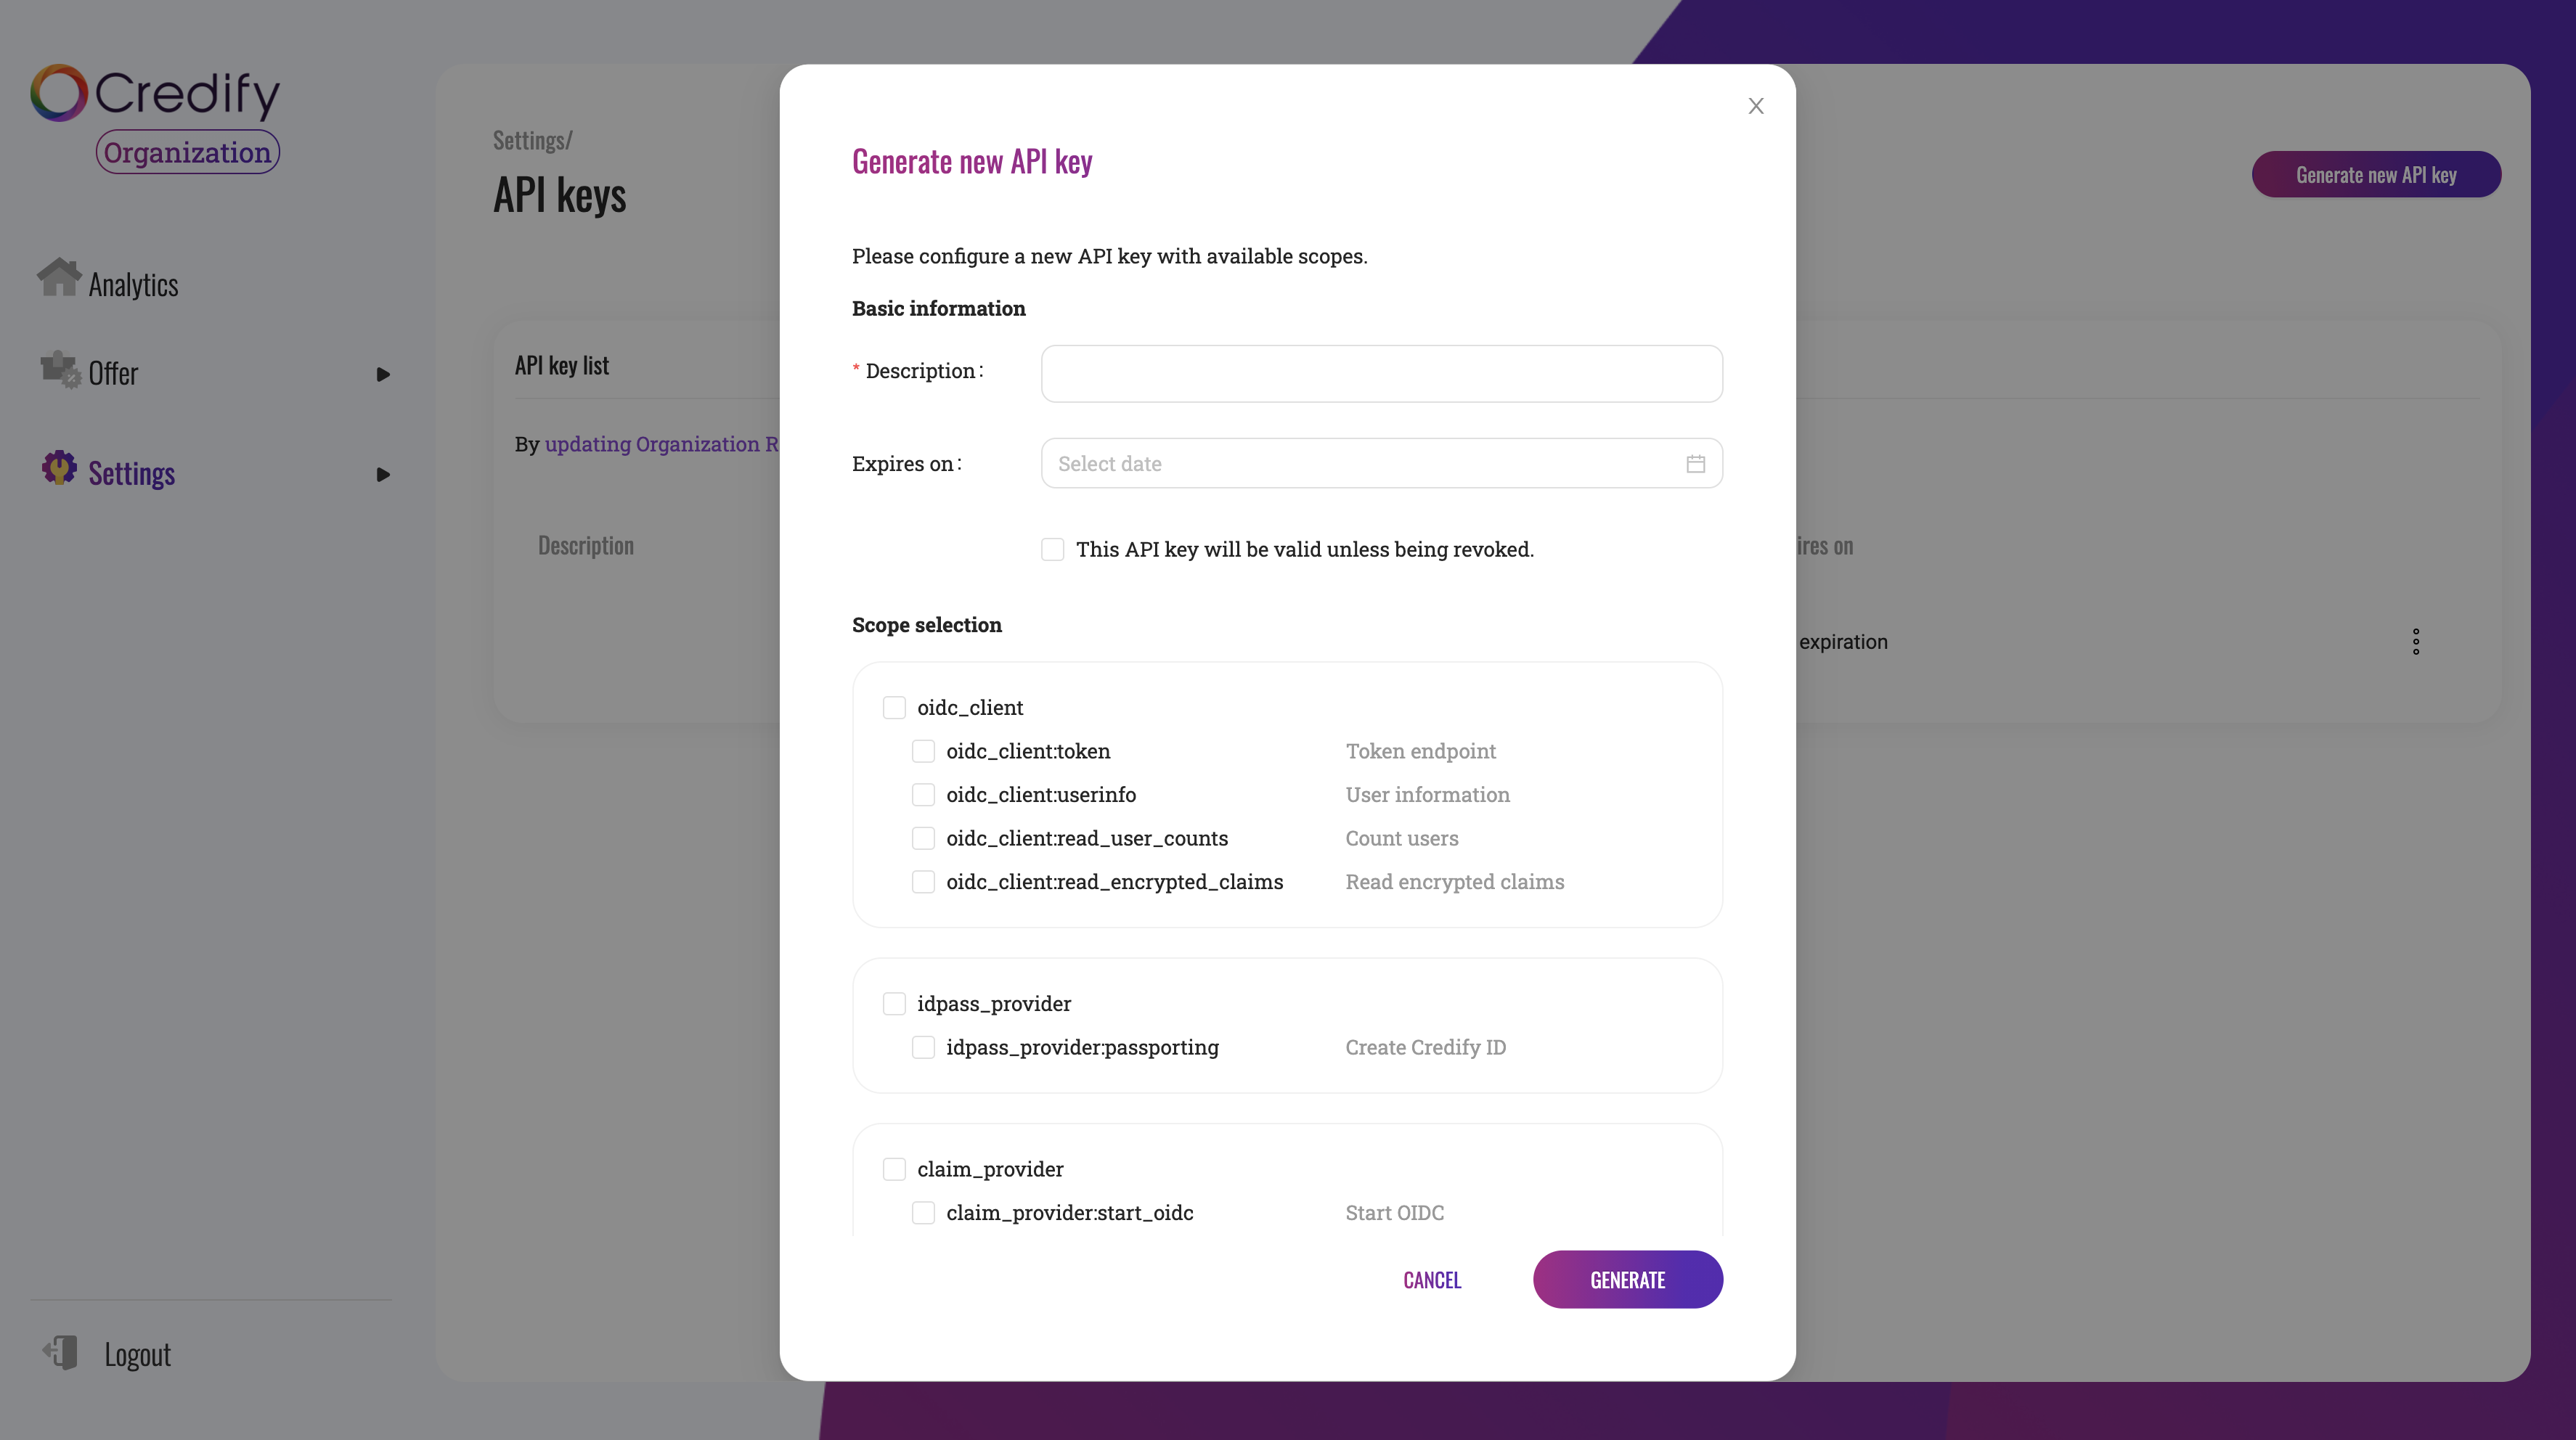
Also, please ensure you create API keys. To use BNPL, you need to grant oidc_client to the API keys.
# 1. Set up the project
- Node.js
- Fork Node.js Skeleton service and clone it to your machine
Repository: https://github.com/credify-pte-ltd/serviceX-service-provider-skeleton-nodejs
$ git clone https://github.com/your-account/serviceX-service-provider-skeleton-nodejs.git
$ cd serviceX-service-provider-skeleton-nodejs
$ yarn
- Set up
.env
$ cp .env.sample .env.local
Here are the details of .env.local.
# `sandbox` or `production`
MODE=sandbox
# port to expose
PORT=3000
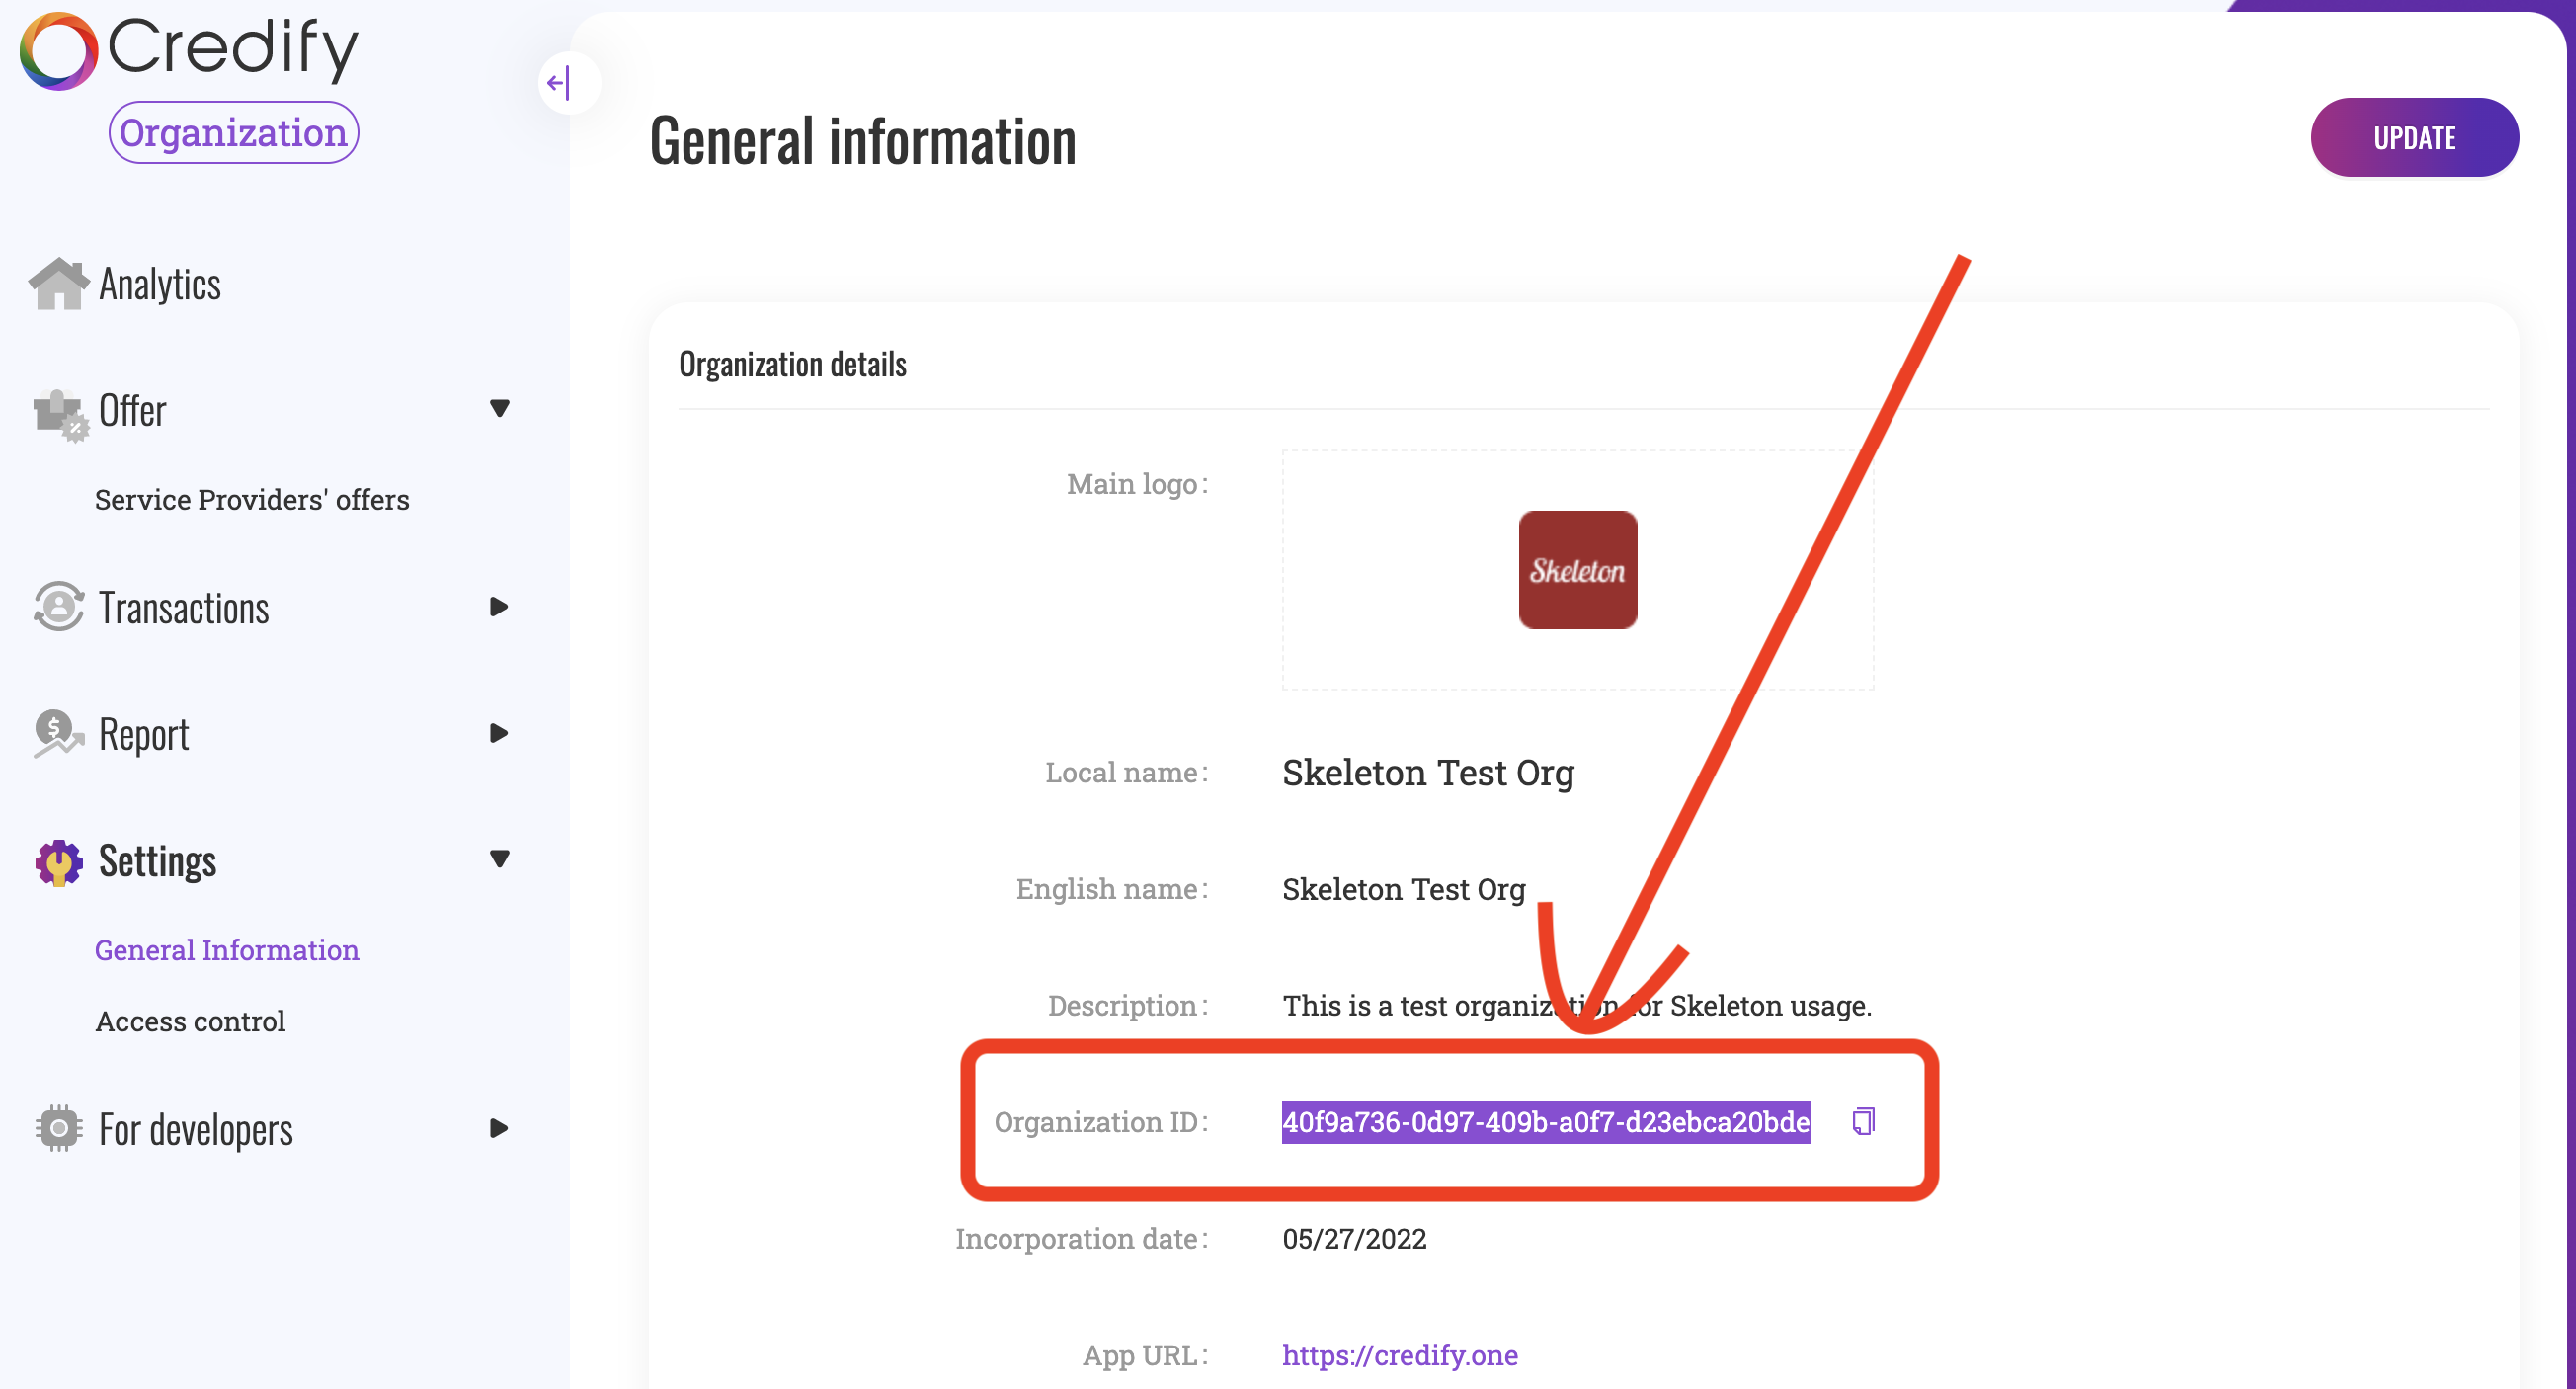
# organization ID you get on Dashboard
APP_ID=a0f9a736-ad97-d09b-abf7-d23ebca20bde
# your signing key you can see on Dashboard
APP_SIGNING_KEY=MC4aCZaWbPYDK2VwBBIEIOK3AJ5hzZ8s9YovNIa2dUmmEZ+PbpgeSfI+smahl0sJ
# your API key you can generate on Dashboard
APP_API_KEY=2pL9oQs10oI8LmN70Ip6OCDCkNmVZJ97JRnZRPy5NGeJgP00IkaBn21woWa0LcM
# redirect URL for OIDC
APP_REDIRECT_URL=https://2a88-116-109-110-206.ap.ngrok.io/api/callback
Here is organization ID.
Here is a signing key. You need to provide a password to see the value. In the .env, you need only the contents (e.g., MC4BCZaWbP...mahl0sJ).
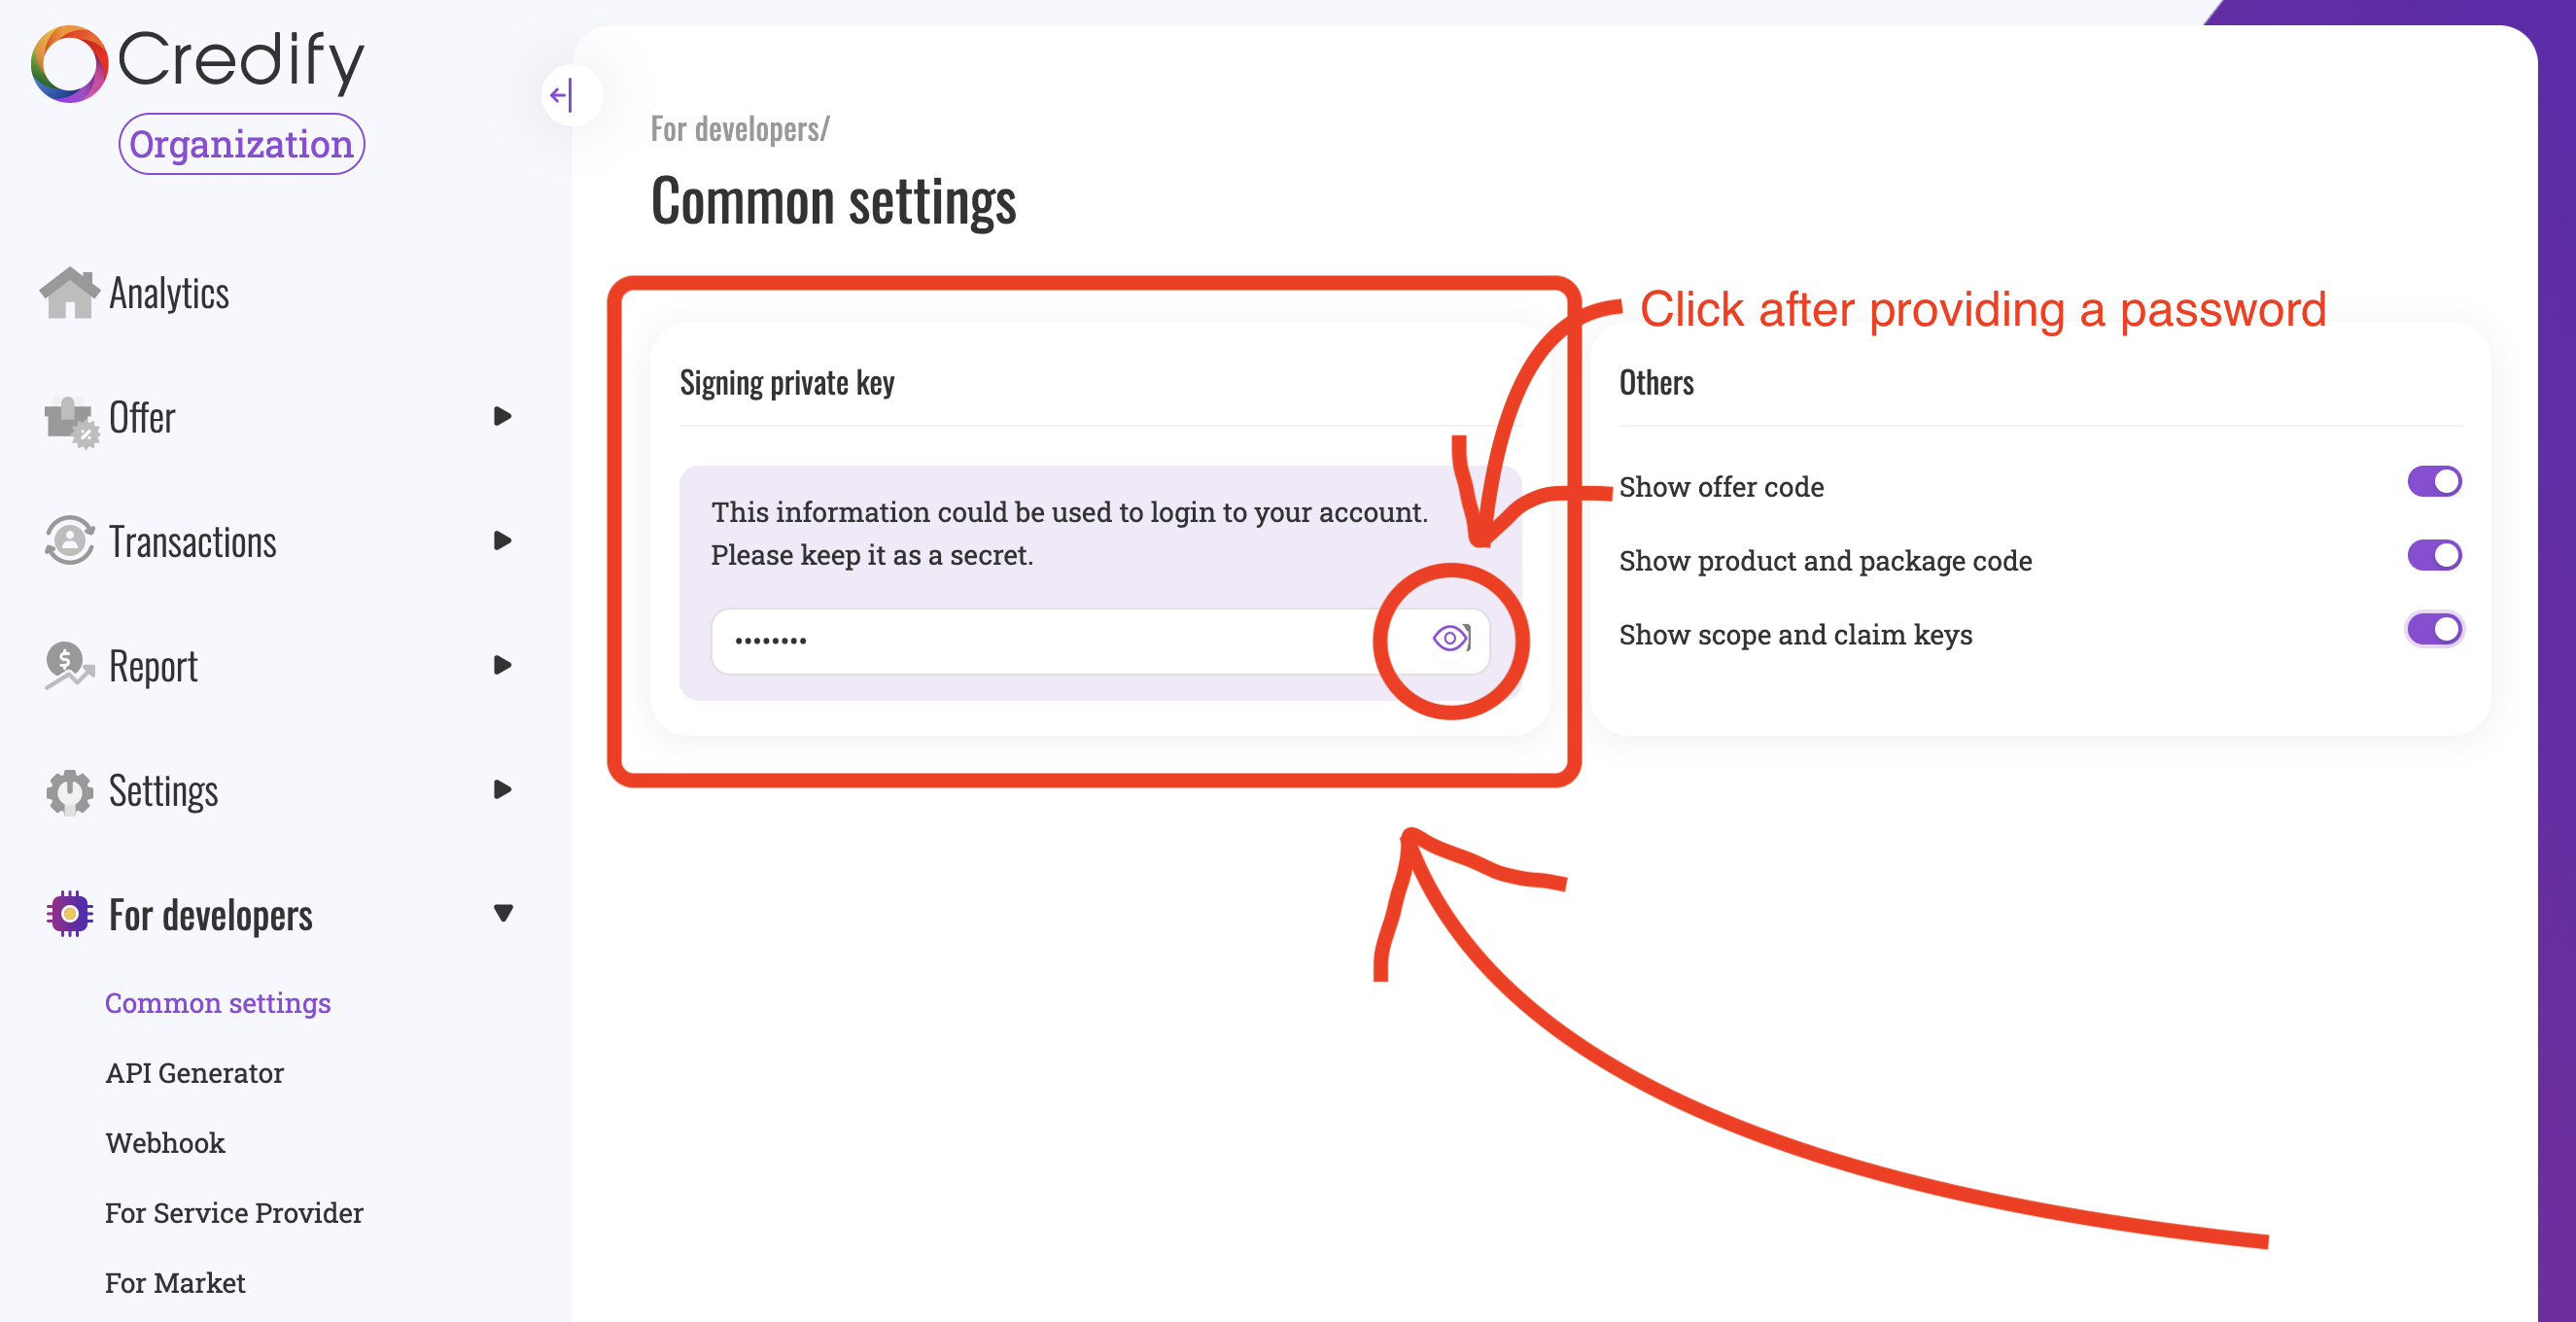
In the same UI, you can check your encryption private key, too. Please save the encryption private key as encryption-key.pem in the root of this project.
Let's test if it's working well with the following command.
$ yarn dev
Open another tab and run this command.
$ curl "http://localhost:3000/api/hello"
# 2. Customize the project
# OpenID Connect (OIDC) config
Regarding OIDC config, please check /pages/api/oidc. You can configure response mode and response type.
# OIDC callback
Refer to /pages/api/callback
When a user finishes OIDC auth, we will redirect the user to your callback. In this callback, you will receive authorization code (or access token) and render some UI for the user. In the case of insurance, you may want to ask the user to pay the premium at this step.
# 3. Integration test
Firstly, we will register a product of yours. Secondly, you have to create an offer using this product.
We will provide you with a web app to test this offer.
It will be easier to test the e2e flow if you use ngrok. You expose your local server and register your redirect URL with ngrok on our dashboard.