# How to integrate BNPL / Purchase Order Financing (POF) for Market
# Overview of the flow
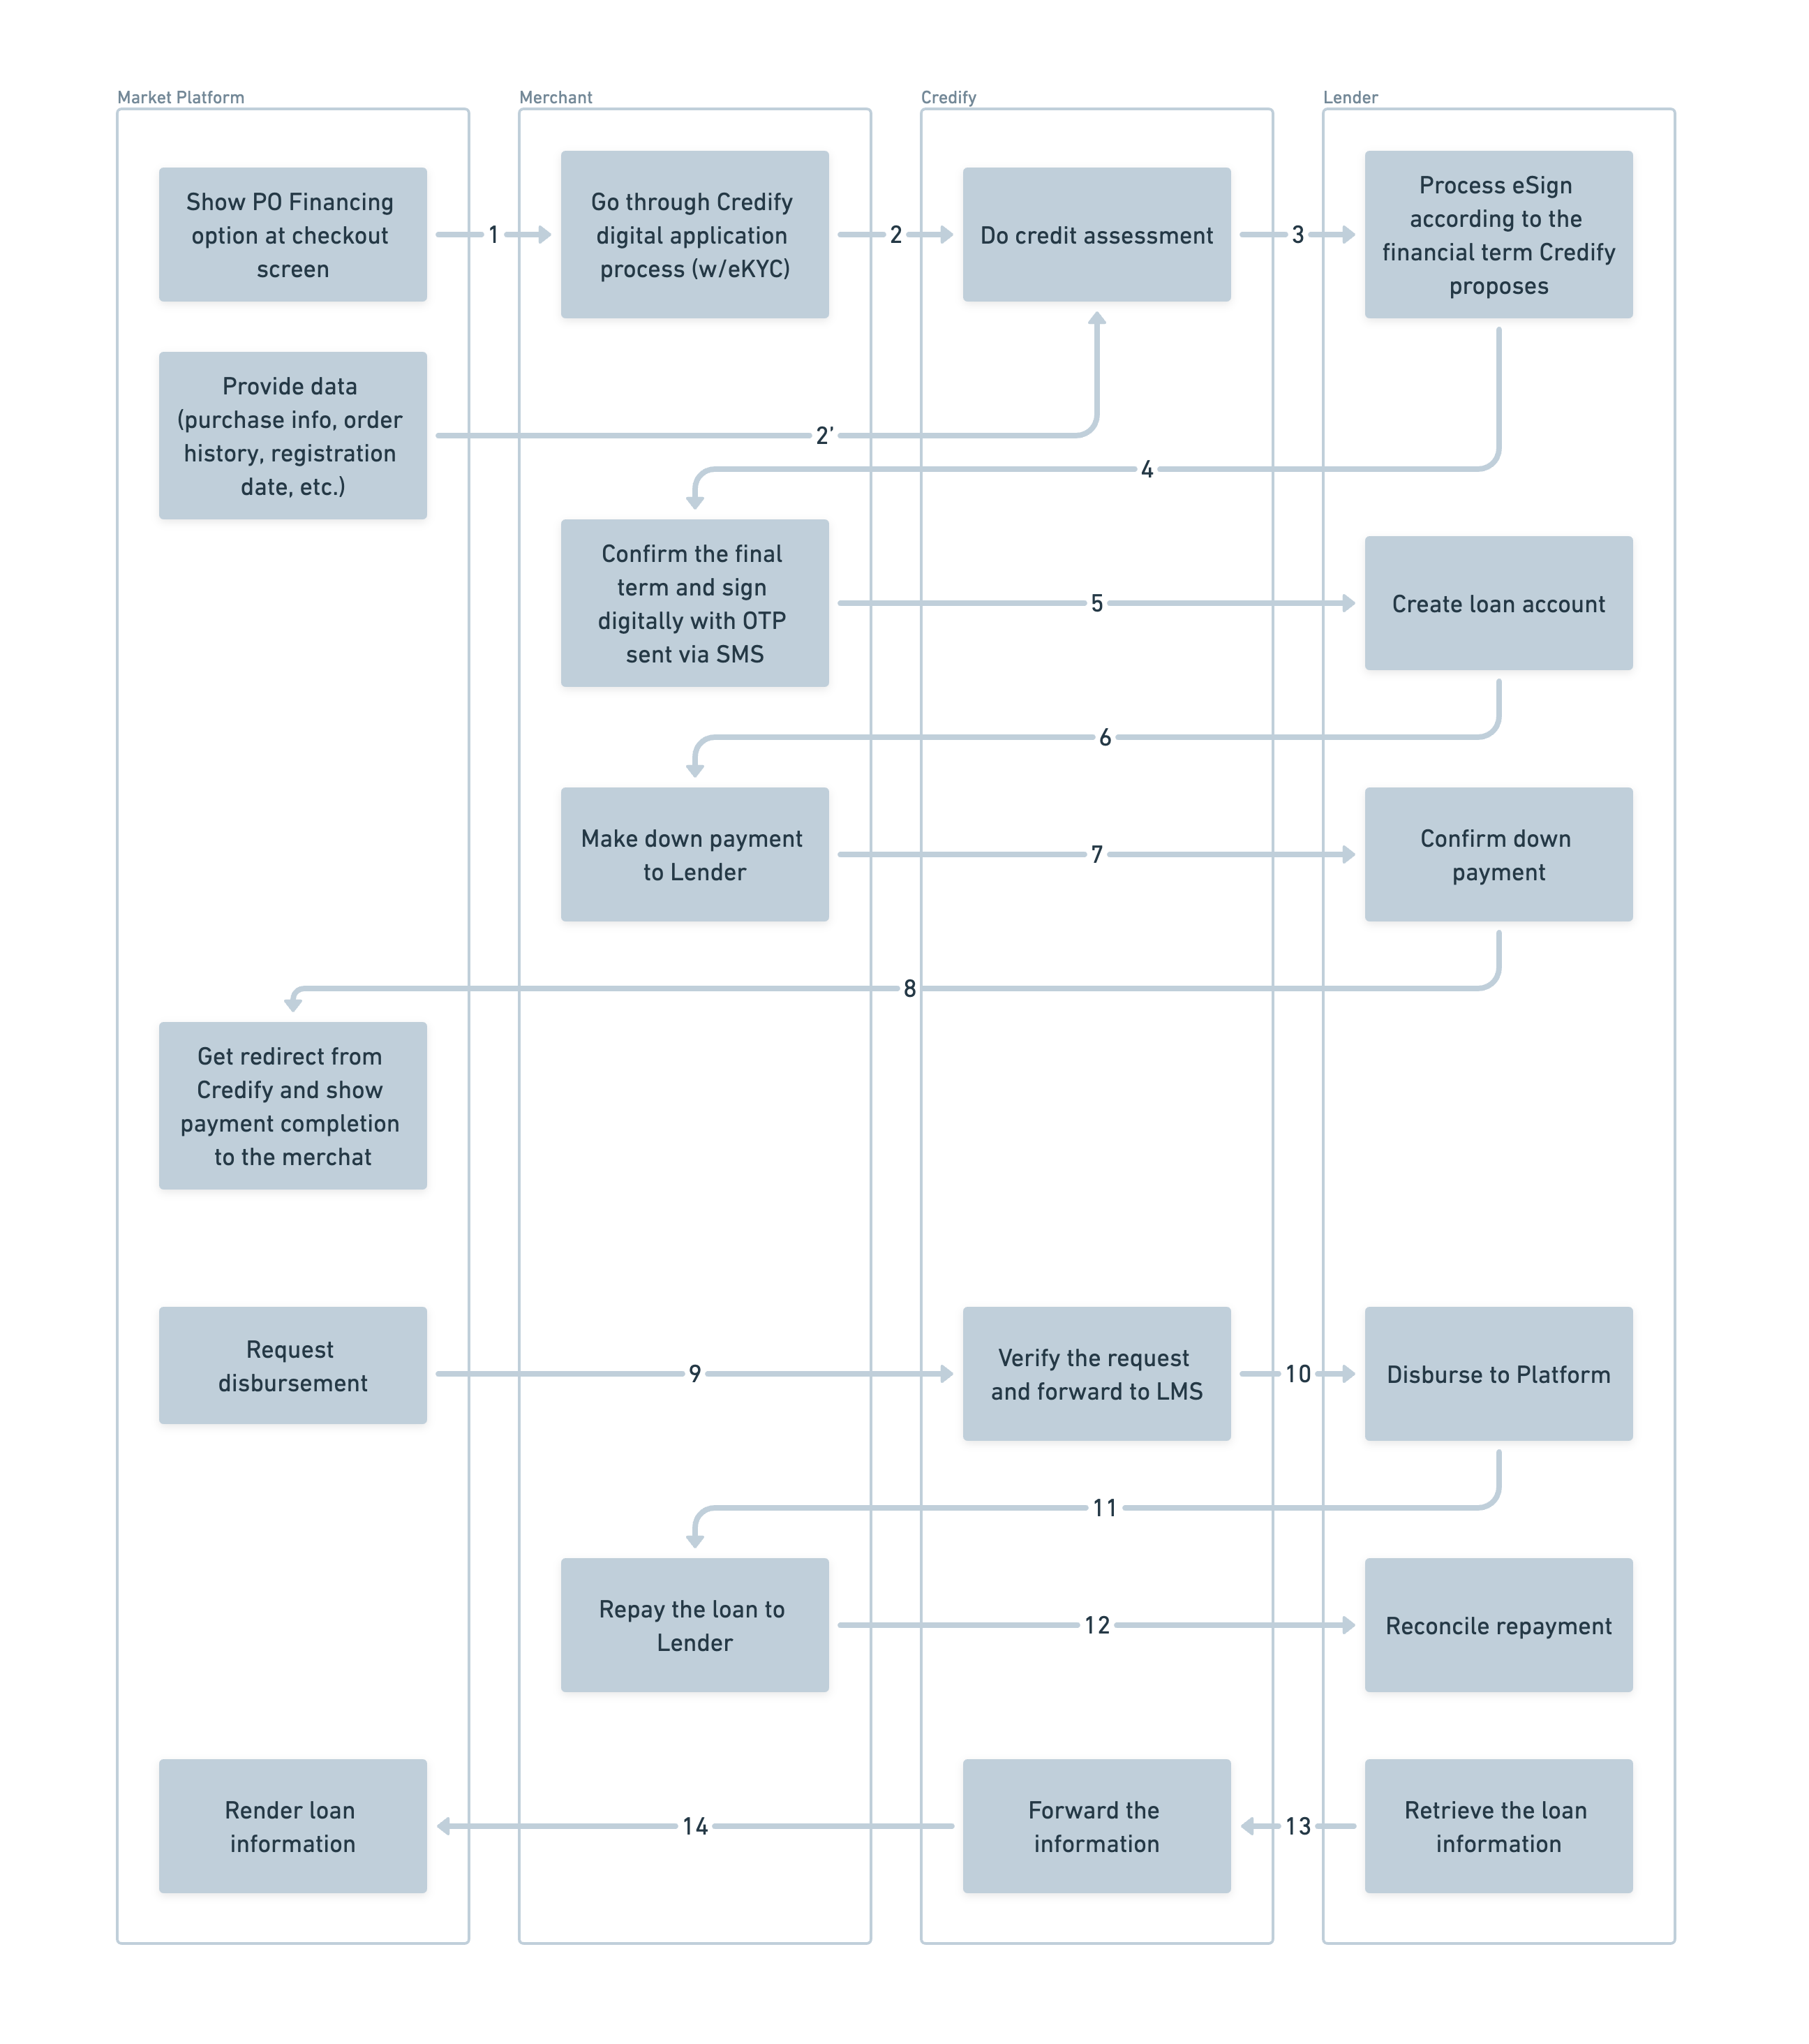
- User selects payment with BNPL / POF at the checkout page on Market platform and gets redirected to serviceX to complete the application.
- All the application data and some bits of information that Market has is collected by serviceX and sent to Credify for credit assessment.
- Credify sends the result of the credit assessment to a corresponding lending facility.
- The lending facility request User to e-sign the contract.
- The signed contract is sent to the lending facility to set up a loan account.
- The lending facility requests User to make a down payment.
- User needs to make a down payment to the lending facility.
- Once the lending facility receives the down payment, User gets redirected to Market platform to complete the purchase.
- Market requests serviceX for disbursement.
- serviceX instructs the lending facility to disburse the loan amount to Market.
- The lending facility notifies User of repayment schedule.
- User repays the loan amount to the lending facility.
- The lending facility notifies serviceX of the repayment.
- serviceX notifies Market of the repayment information.
# Integration steps for Market
- Market needs to integrate Create a payment intent API
- Next, Market needs to implement a redirect endpoint to render checkout completion page for User.
- In addition, it is recommended to implement a webhook endpoint to receive notifications from serviceX about the status of the transaction.
# 1. Integrate Create a payment intent API
All API requests must be authenticated with an access token. The access token is obtained by calling the following API.
You can reuse the same token until it expires. The token expires in 24 hours.
# Request
POST https://sandbox-api.credify.dev/v2/public/client-auth
The key is an API key you can generate on serviceX dashboard.
{
  "key": "xxxxxxxxxxxxxxxxx"
}
# Response
{
  "access_token": "xxxxxxxxxxxxxxxxxxxxxxxxxxxxxxxxxxxxxxxxx"
}
The following API is used to create a payment intent for a BNPL / POF transaction. The payment intent is used to track the status of the transaction and handle the customer interaction.
# Request
POST https://sandbox-api.credify.dev/v2/integration/marketplace/intents
You need to pass the access token obtained from the previous step in the Authorization header as a bearer token.
# Response
This API returns a URL that you can redirect the User to proceed with BNPL / POF.
{
  "id": "xxxxxxxxxxxxxxxxxxxxxxxxxxxxx",
  "app_url": "https://sandbox-app.credify.one/dop/intents/xxxxxxxxxxxxxxxxxxxxxxxxxxxxx"
}
The integration flow is Market frontend app shows a button at the checkout page. When the user clicks the button, Market backend app calls this API to create a payment intent. Then, Market frontend app calls Market backend API to call Credify Intent API. Finally, Market frontend app redirects the user to the URL returned from this API.
# 2. Handle redirection from serviceX after the user completes the application
After the user completes the application, serviceX redirects the user to the URL you create. The URL contains a path parameter intentId that you can use to retrieve the payment intent.
You can set Api base Url on serviceX dashboard. The redirection is made with the following URL.
${Api base Url}/bnpl/orders/${intentId}/redirect
It may contain a query parameter error if there is an error during the application process. You can use the error parameter to display an error message to the user.
# 3. Handle webhook notifications from serviceX
serviceX sends webhook notifications to the URL you set on serviceX dashboard.
Please reference this page for more details. Webhook API document