# [Market] BNPL Integration guide - Basic
This section explains the simplest approach to embed BNPL options to your (Market) platform without data sharing functionality.
Let's integrate BNPL within 30 mins!
TIP
This page does not use the data sharing feature of serviceX.
If you want to use the data sharing function, then you may want to have a look at this guide.
Here is the Skeleton repository: https://github.com/credify-pte-ltd/bnpl-skeleton-nodejs for your reference.
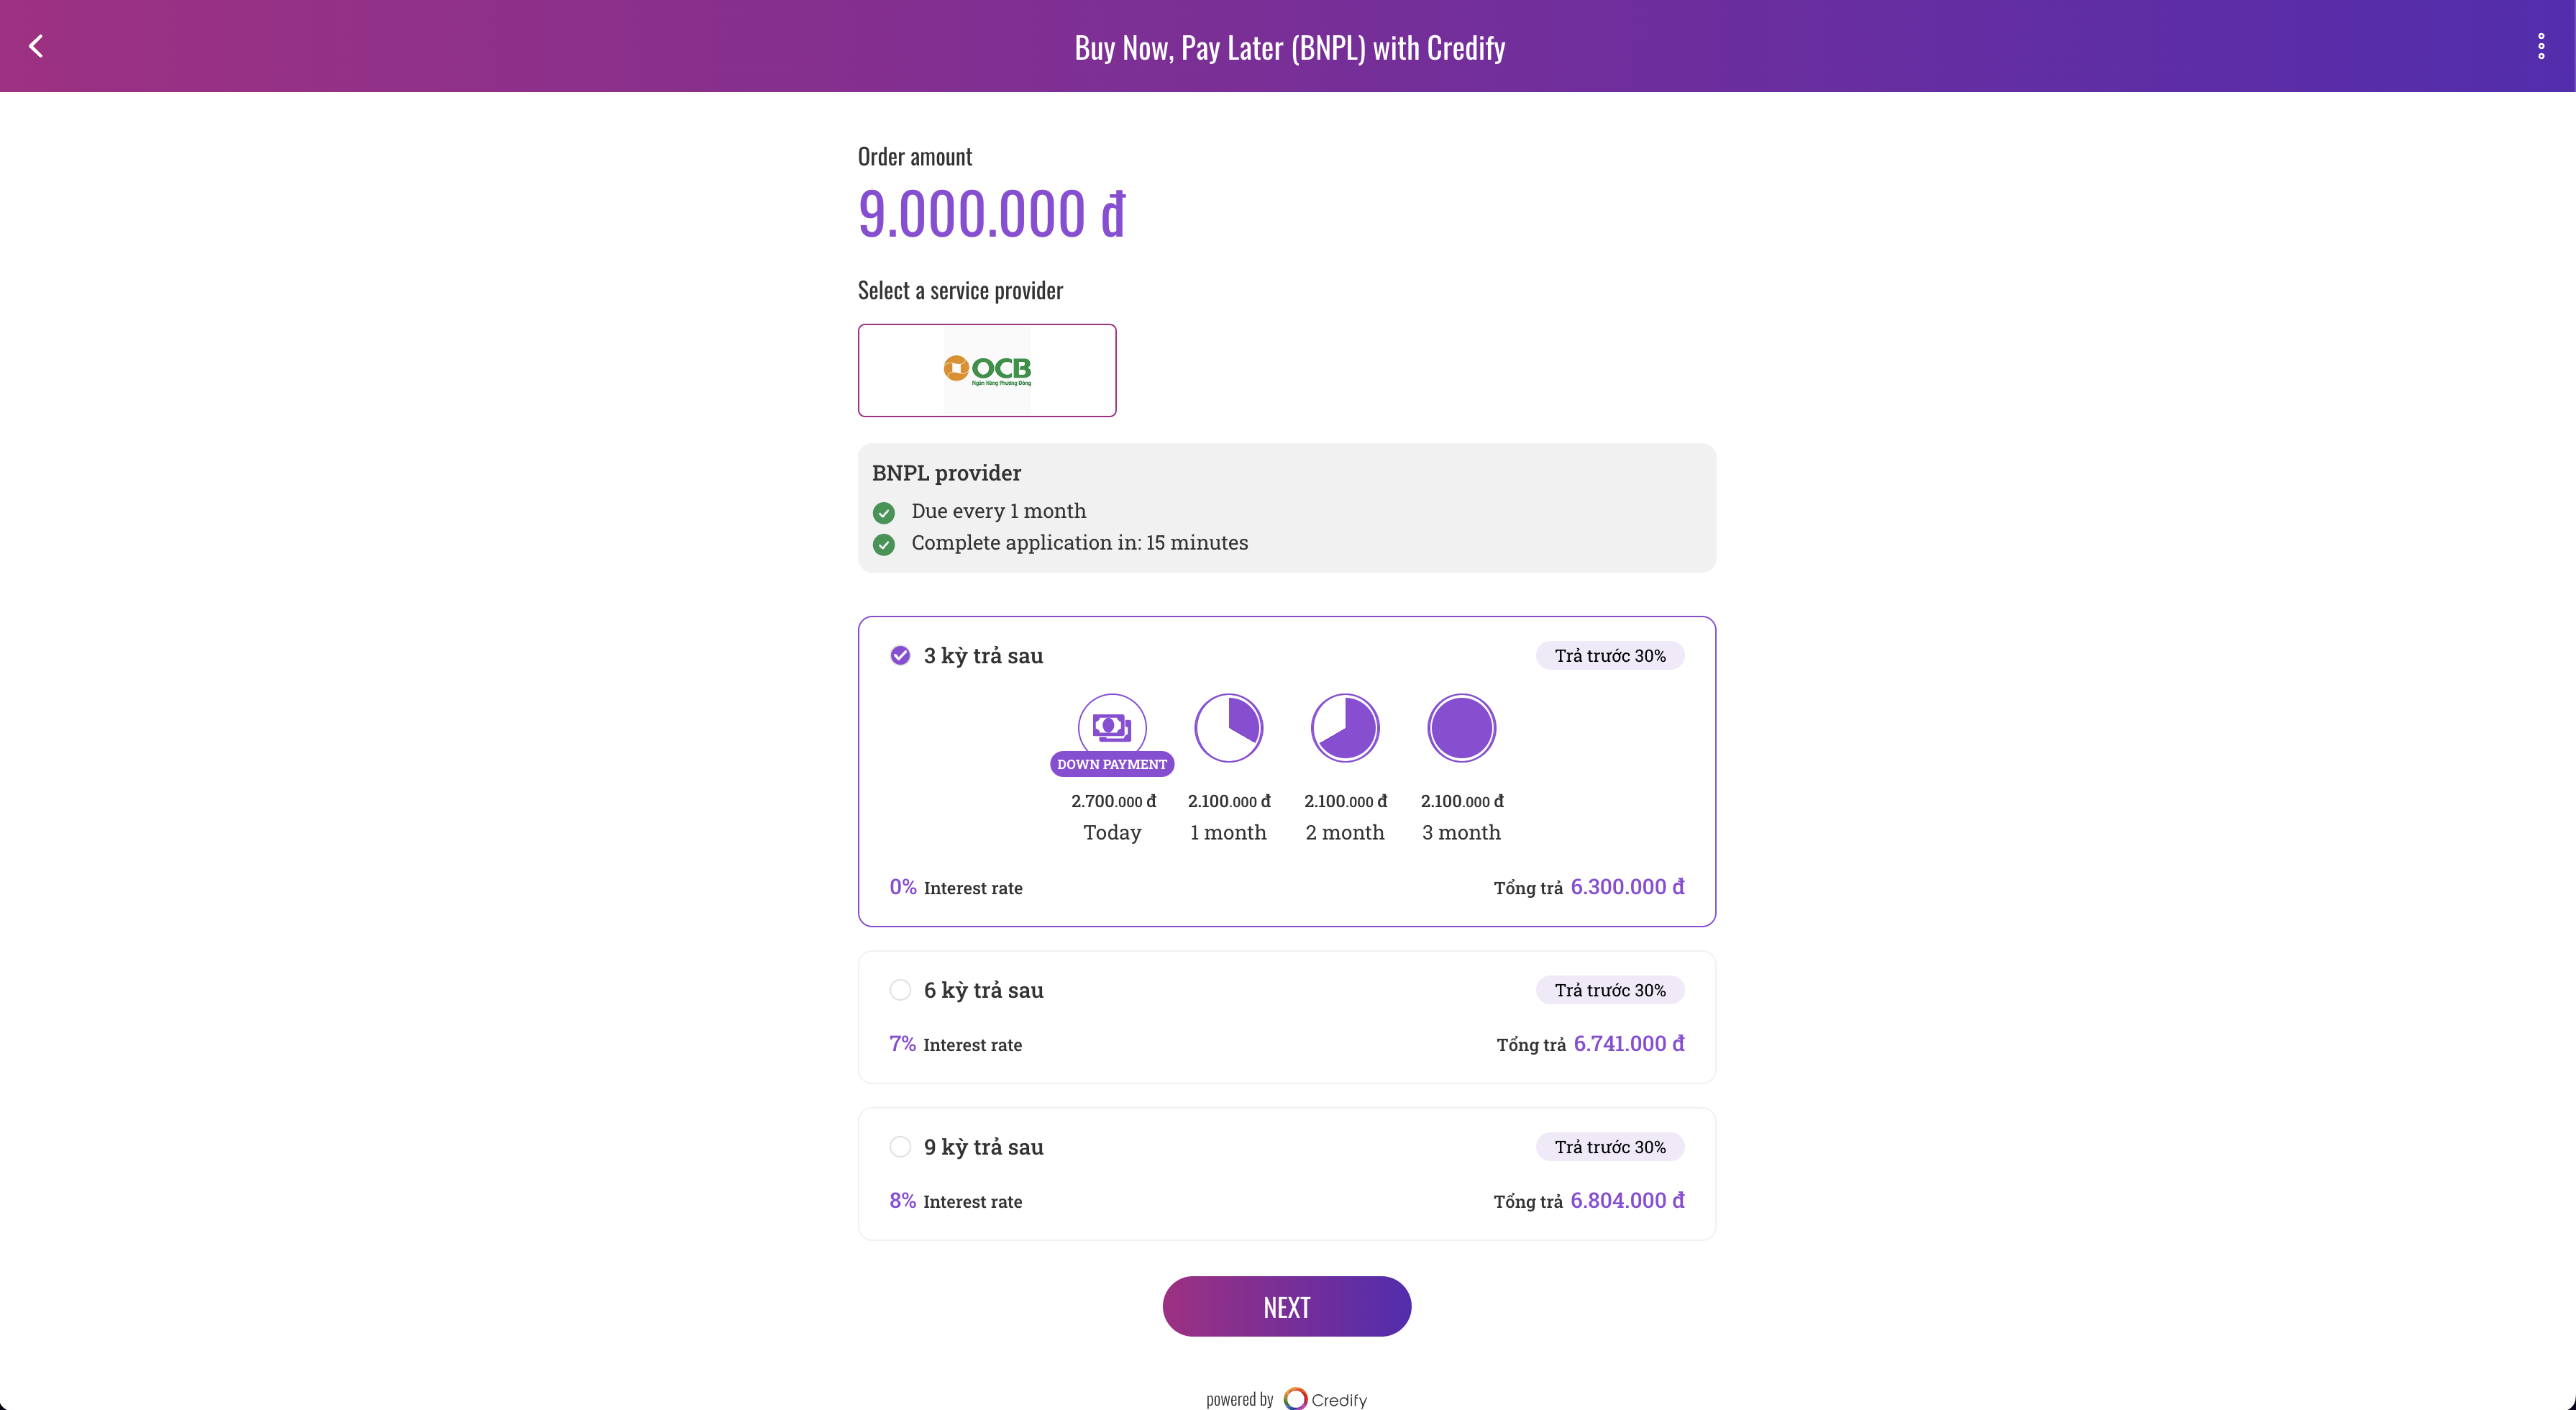
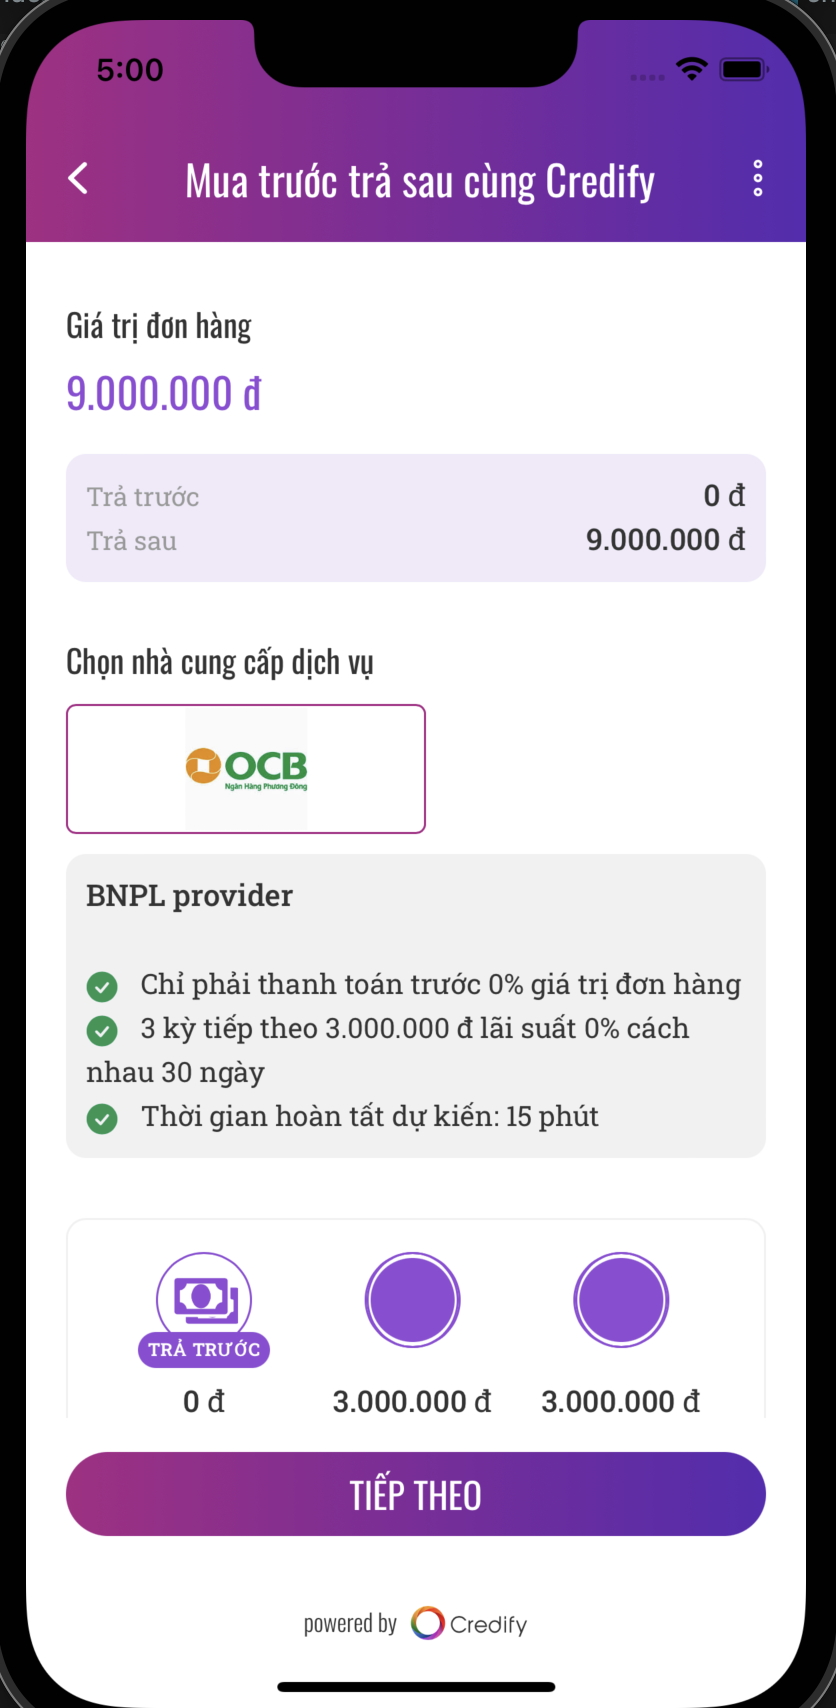
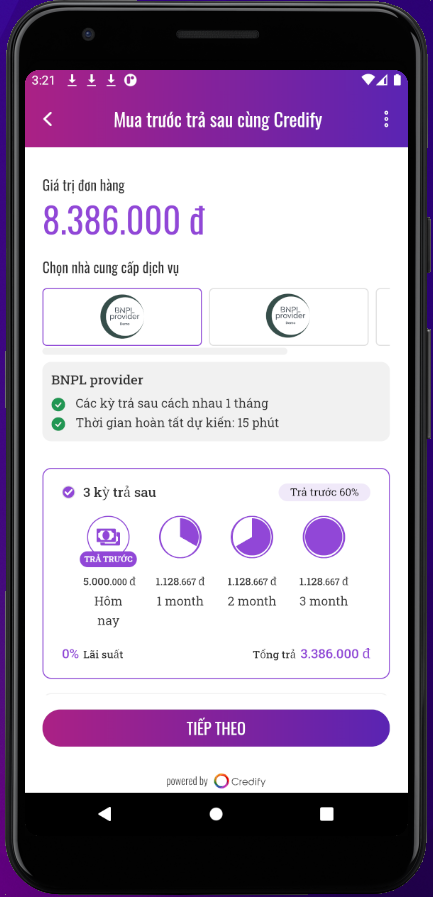
Sample UI:
TIP
This is a sandbox environment for you to play around with our BNPL systems. If you need the production environment, please let us know (email: info@credify.one).
# 0. Preparation
If you have not set up a Market yet, please refer to Getting started - Set up.
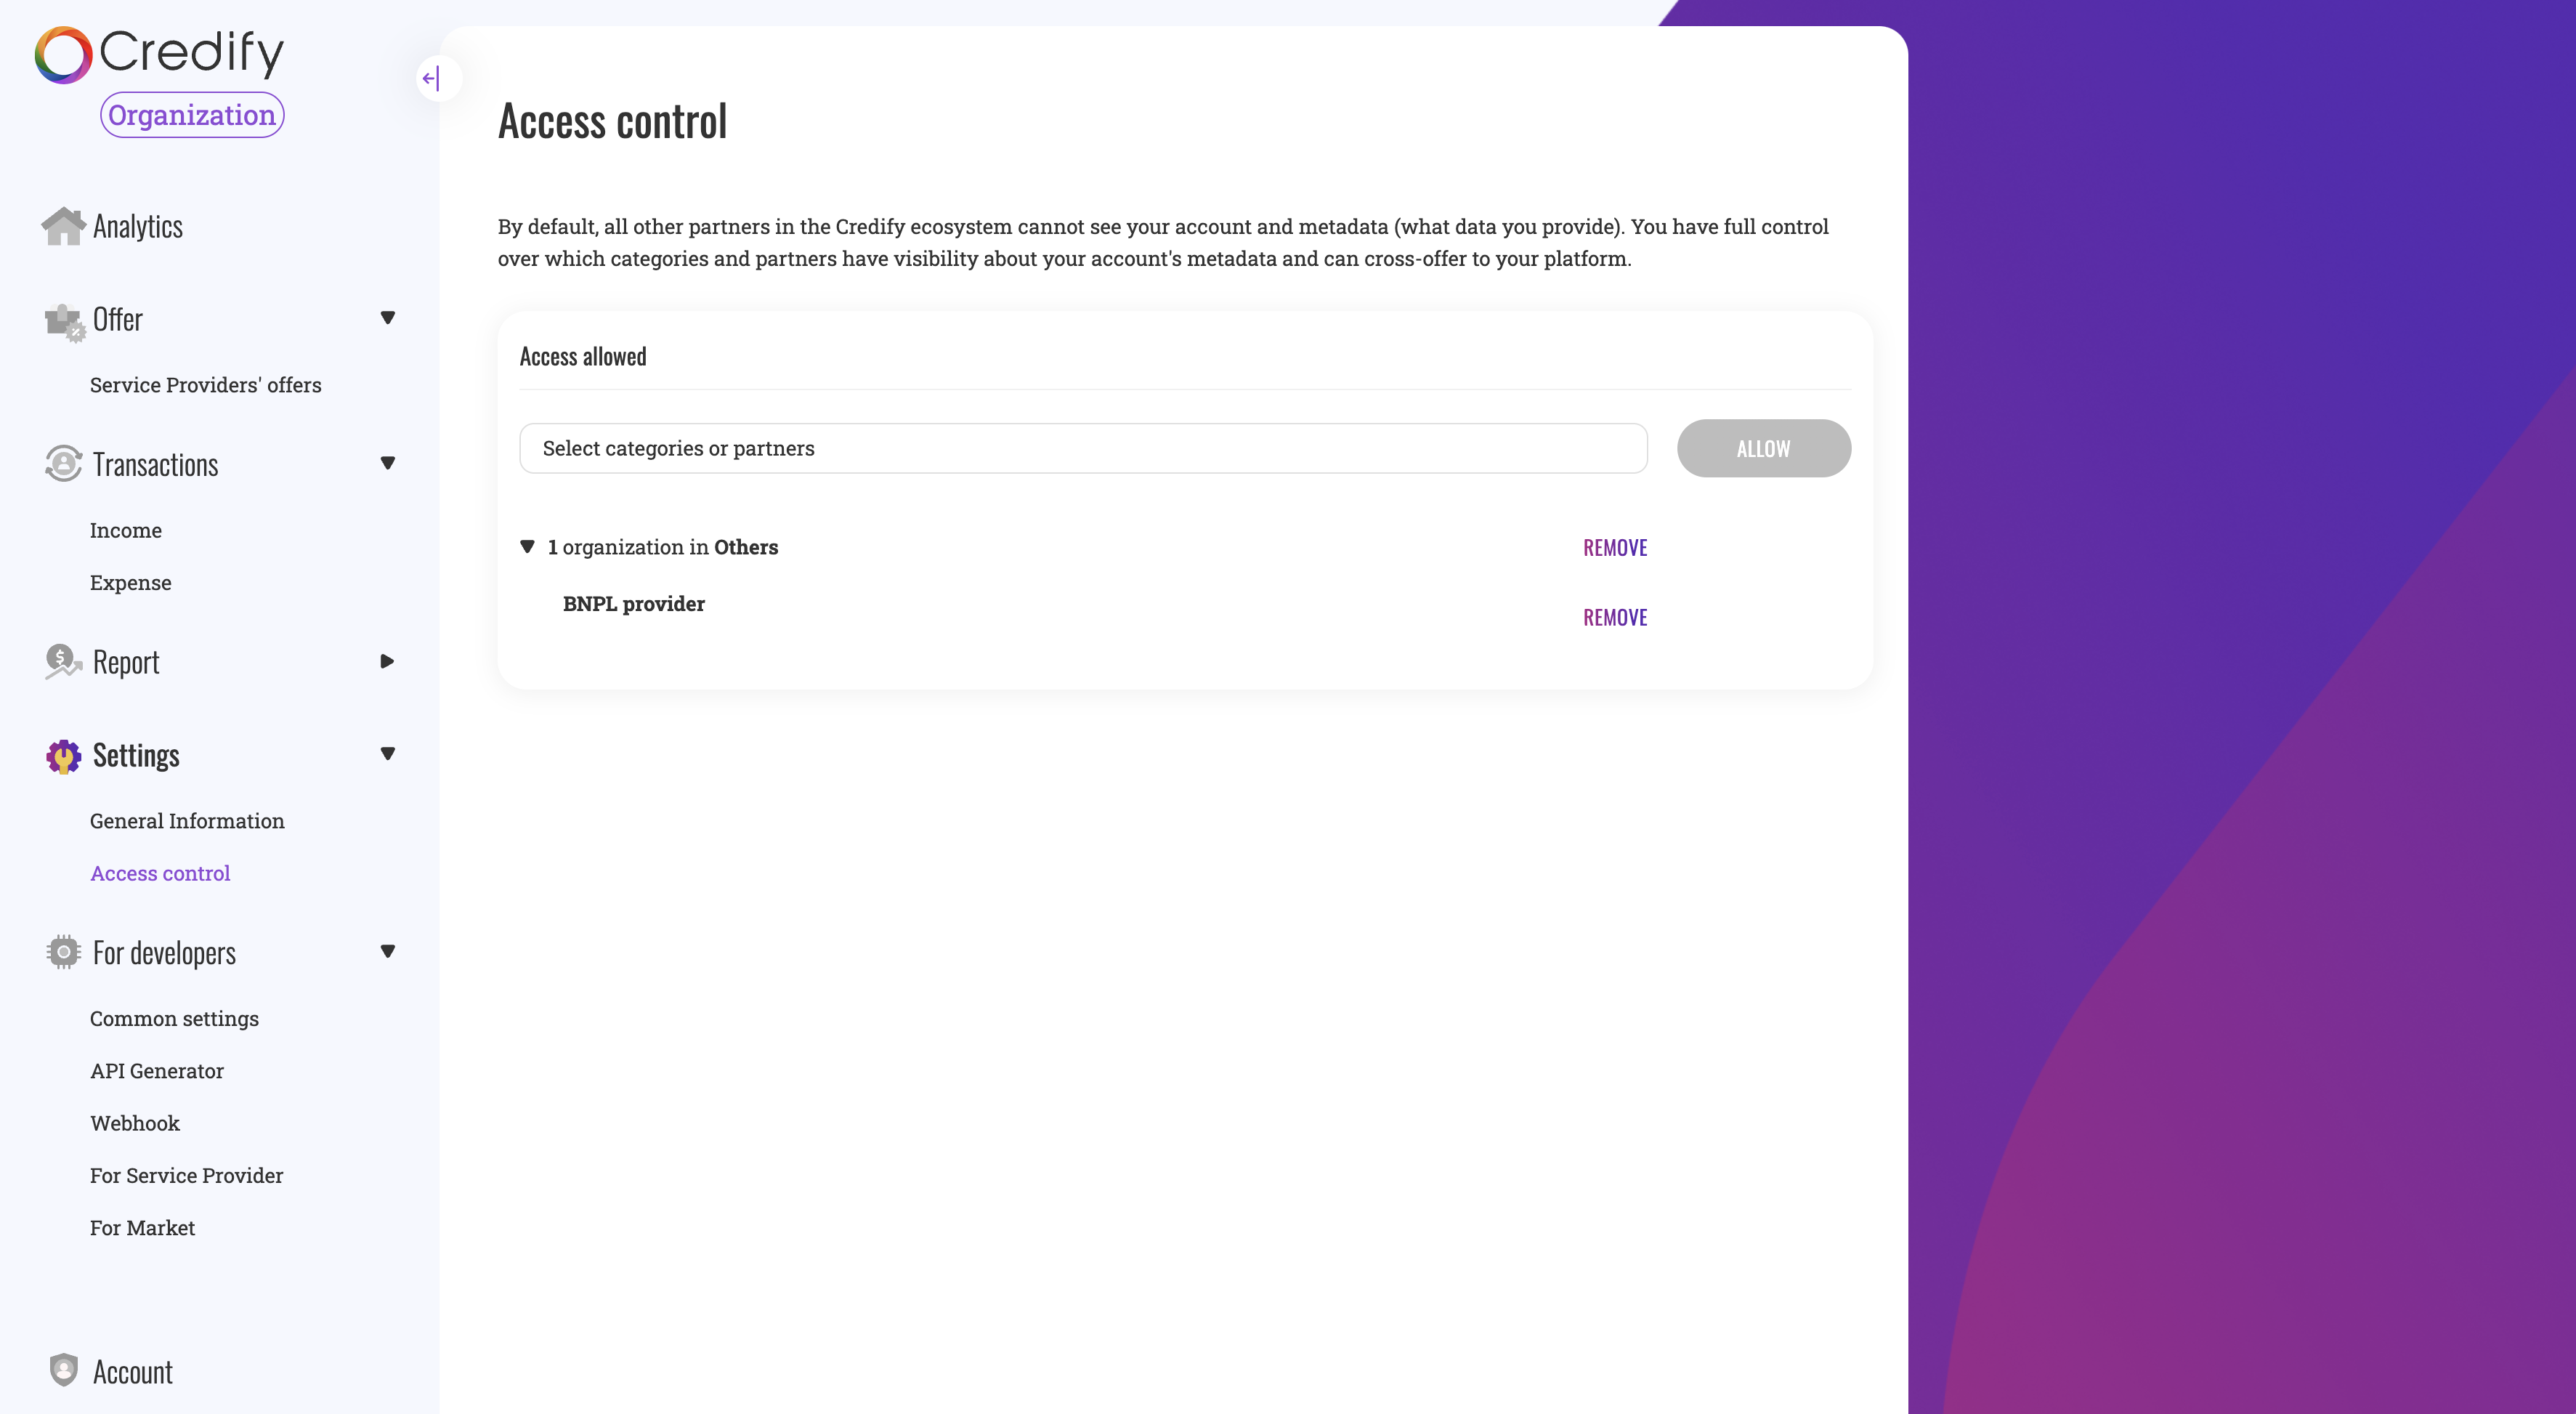
Please make sure that you allow BNPL providers to access your scope schemas. In the sandbox environment, you can test BNPL with BNPL provider under Others section as the following screenshot.
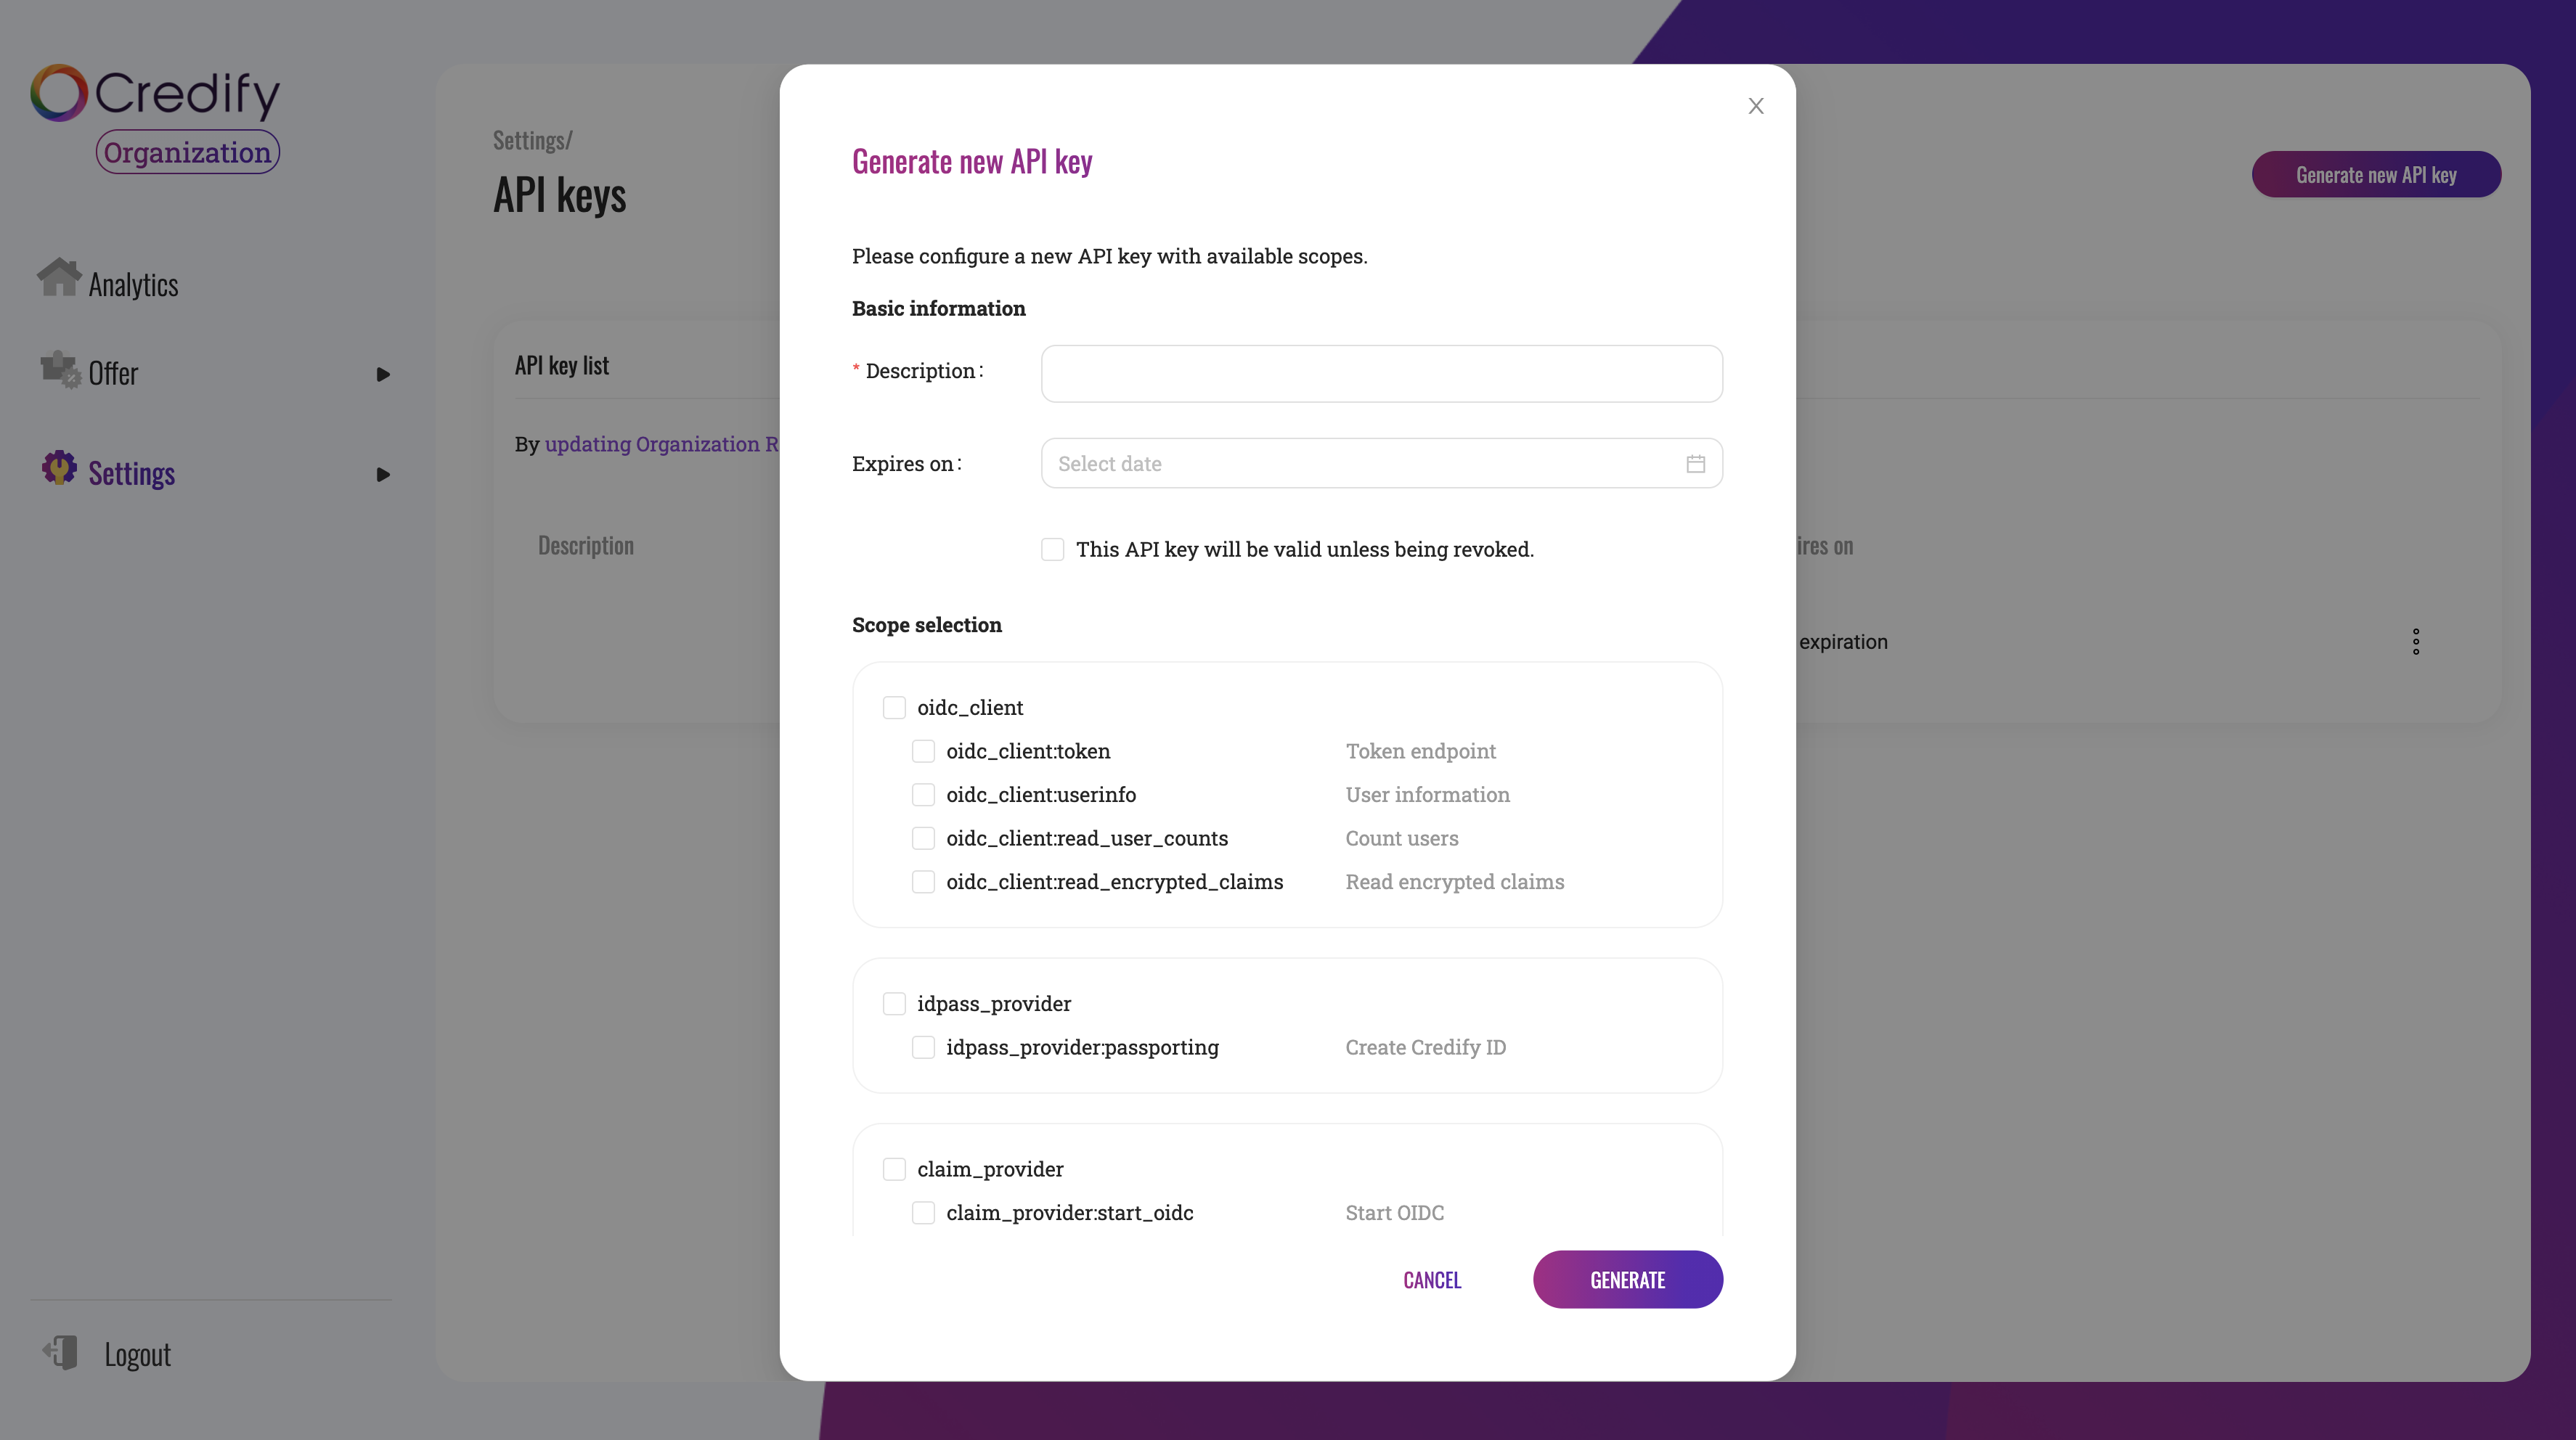
Also, please ensure you create API keys. To use BNPL, you need to grant claim_provider to the API keys.
# 1. Set up the backend project
What you have to do regarding the backend integration is
- Create BNPL order
- Handle updates of order status notified via webhook
- Return BNPL successful page URL
- Node.js
- Others
Please fork this repository, clone it to your machine, and check v1.js. The sample code is all implemented.

# 2. Integrate frontend SDK into your platform
Integration models - Frontend integration has URLs to our SDKs.
Before going through this section, please make sure you have approved an offer about BNPL.

Besides, please update the organization information. All you have to update is api base URL.
- Install SDK
- Swift
- Kotlin
- React.js
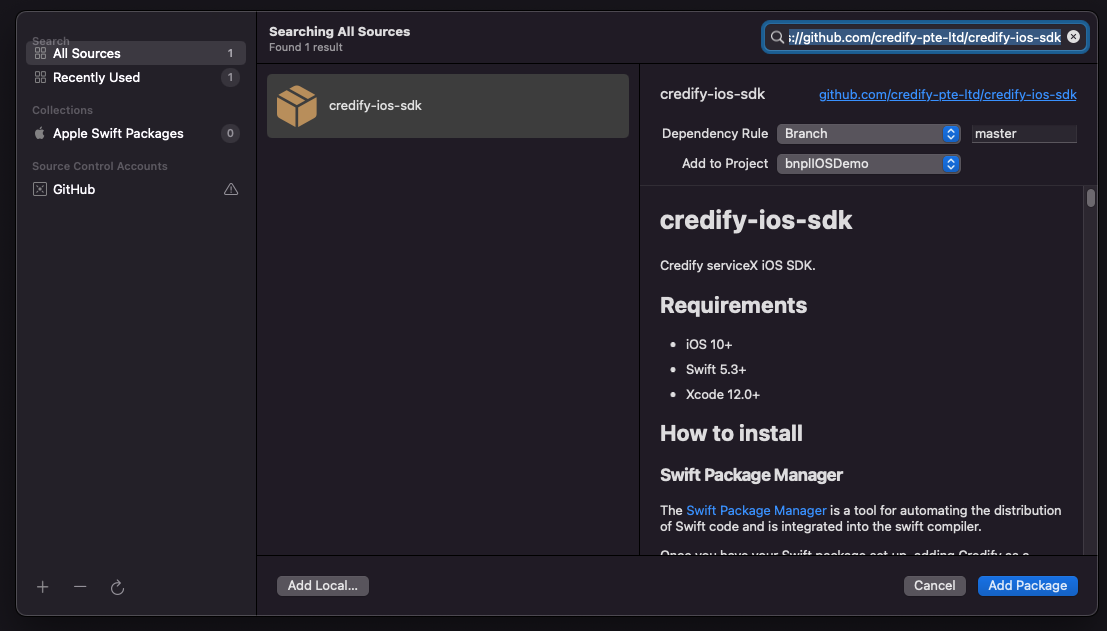
If you use Swift Package Manager, please input https://github.com/credify-pte-ltd/credify-ios-sdk.
Once you successfully install the SDK, you have to instantiate a Credify object.
import UIKit
import Credify

let API_KEY = "bkhoiuoitcrtxttfhsokyyfcsrtnnlqigyuimzpifdvzrxgbikmgfspasxagbtzt"
let APP_NAME = "BNPL demo market"
let APP_ID = "a0f9a736-ad97-d09b-abf7-d23ebca20bde"

class SampleViewContoller: UIViewController {
    private let bnpl = serviceX.BNPL()
    private let passport = serviceX.Passport()

    private var user: CredifyUserModel!
    private var canUseBNPL: Bool = false

    override func viewDidLoad() {
        super.viewDidLoad()

        let config = serviceXConfig(apiKey: API_KEY, env: .sandbox, appName: APP_NAME)
        serviceX.configure(config)

    }
}

- Set a user object
- Swift
- Kotlin
Some of our functions need to receive a user object (CredifyUserModel). To interact with our BNPL functionalities, we need your users to be logged in. Your internal user class needs to be mapped to CredifyUserModel.
- Check BNPL availability
- Swift
- Kotlin
- React.js
Once you map your user to CredifyUserModel, you can call bnpl.getBNPLAvailability to see if this user can use BNPL options.
Please make sure that you update API base URL on Dashboard.
If you always get isAvailable: false, please let us know. We need to whitelist your organization in our system.
class SampleViewContoller: UIViewController {

    ///

    func getBNPLAvailability() {
        bnpl.getBNPLAvailability(user: self.user) { result in
            switch result {
            case .success((let isAvailable, let credifyId)):
                self.user.credifyId = credifyId

                if isAvailable {
                    self.canUseBNPL = true
                } else {
                    self.canUseBNPL = false
                }

            case .failure(let error):
                print(error)
            }
        }
    }
}
- Create Order ID
If a user uses BNPL options, you will have to create Order ID. In Set up the backend project, you have created POST /orders endpoint. You may want to call this endpoint via your internal backend systems. In this instruction, the frontend app calls into the Skeleton service directly for convenience.
- Swift
- Kotlin
- React.js
In this example, the project has installed 2 new packages as following, but these are not required in the actual integration. It depends on your existing project.
- Alamofire for API call
- NVActivityIndicatorView for loading view
import UIKIt
import Credify
import Alamofire
import NVActivityIndicatorView

///

let CREATE_ORDER_API_URL = "http://localhost:8000/v1/orders"
let ORDER_DATA: [String: Any] = [
    "reference_id": "testtest",
    "total_amount": [
        "value": "9000000",
        "currency": "VND"
    ],
    "order_lines": [
        [
            "name": "AirPods Pro",
            "reference_id": "airpods_pro",
            "image_url": "https://www.apple.com/v/airpods/shared/compare/a/images/compare/compare_airpods_pro__e9uzt0mzviem_large_2x.png",
            "product_url": "https://www.apple.com/vn/airpods-pro/",
            "quantity": 1,
            "measment_unit": "EACH",
            "unit_price": [
                "value": "4000000",
                "currency": "VND"
            ],
            "subtotal": [
                "value": "4000000",
                "currency": "VND"
            ]
        ],
        [
            "name": "Apple Watch 3",
            "reference_id": "apple_watch_series_three",
            "image_url": "https://www.apple.com/v/apple-watch-series-3/v/images/overview/hero__e4ykmvto2gsy_large_2x.jpg",
            "product_url": "https://www.apple.com/vn/apple-watch-series-3/",
            "quantity": 2,
            "measment_unit": "EACH",
            "unit_price": [
                "value": "2500000",
                "currency": "VND"
            ],
            "subtotal": [
                "value": "5000000",
                "currency": "VND"
            ]
        ]
    ]
]

class SampleViewContoller: UIViewController {

    private lazy var activityIndicatorView = {
        return NVActivityIndicatorView(frame: CGRect(origin: CGPoint(x: UIScreen.main.bounds.size.width * 0.5 - 40, y: UIScreen.main.bounds.size.height * 0.5 - 40), size: CGSize(width: 80, height: 80)), type: .ballRotateChase, color: .red)
    }()

    override func viewDidLoad() {
        super.viewDidLoad()

        view.addSubview(activityIndicatorView)

        ///
    }

    ///

    func createOrder(completion: @escaping (OrderInfo) -> Void) {
        // Start loading view if necessary
        activityIndicatorView.startAnimating()

        AF.request(CREATE_ORDER_API_URL,
                   method: .post,
                   parameters: ORDER_DATA,
                   encoding: JSONEncoding.default)
            .responseJSON { (data) in
                DispatchQueue.main.async {
                    self.activityIndicatorView.stopAnimating()
                }
                switch data.result {
                case .success(let value):
                    guard let v = value as? [String: Any] else { return }

                    guard let id = v["id"] as? String else { return }
                    guard let amountObj = v["totalAmount"] as? [String: Any] else { return }
                    guard let amount = amountObj["value"] as? String else { return }

                    let orderInfo = OrderInfo(orderId: id, orderAmount: FiatCurrency(value: amount, currency: .vnd))
                    completion(orderInfo)
                case .failure(let err):
                    print(err)
                }
            }
    }
}
- Start Credify SDK
Now it's ready to kick off BNPL flow with our SDK.
- Swift
- Kotlin
- React.js
class SampleViewContoller: UIViewController {

    ///

    @IBAction func checkout(_ sender: Any) {
        createOrder { orderInfo in
            self.startBNPL(orderInfo: orderInfo)
        }
    }

    func startBNPL(orderInfo: OrderInfo) {
        let task: ((String, ((Bool) -> Void)?) -> Void) = { credifyId, result in
            result?(true)
        }

        bnpl.presentModally(
            from: self,
            userProfile: self.user,
            orderInfo: orderInfo,
            pushClaimTokensTask: task
        ) { [weak self] status, orderId, isPaymentCompleted in
            self?.dismiss(animated: false) {
                print("Status: \(status.rawValue), order id: \(orderId), payment completed: \(isPaymentCompleted)")
            }
        }
    }
}
Let's run the app and test it!
You will see this screen! Congratulations! 🎉
# 3. Handle status management and repayment
So far we see the flow of BNPL requests. Now that your users can authorize BNPL transactions. What's next to you is
- handle payment status
- request disbursement
- instruct users to repay
- Handle payment status
You will receive status update via webhook. When order status becomes approved, you can proceed with the next step, such as delivery of products.
- Request disbursement
You can see BNPL transaction list on Dashboard.
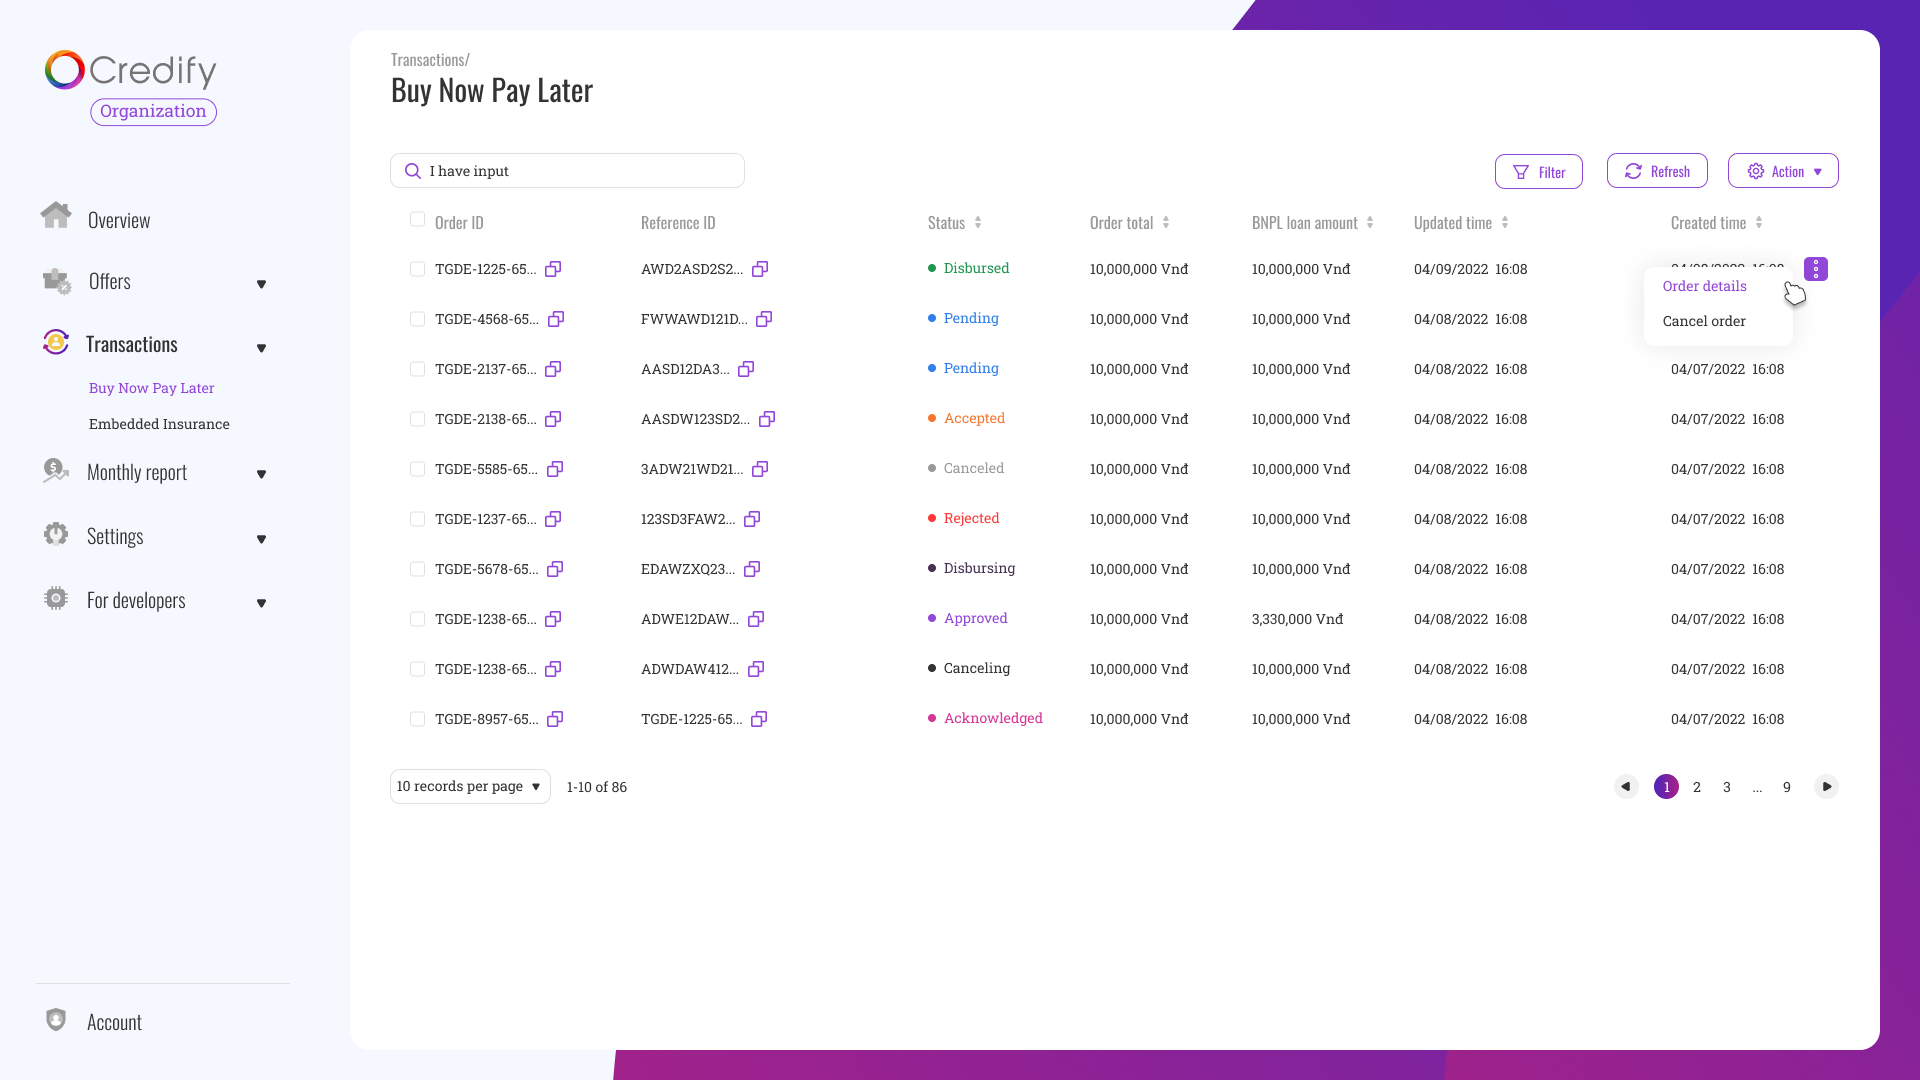
Once a transaction on your platform is done, you need to upload some documents to request disbursement. If you click on a Approved order, you can see the following popup where you can upload documents.
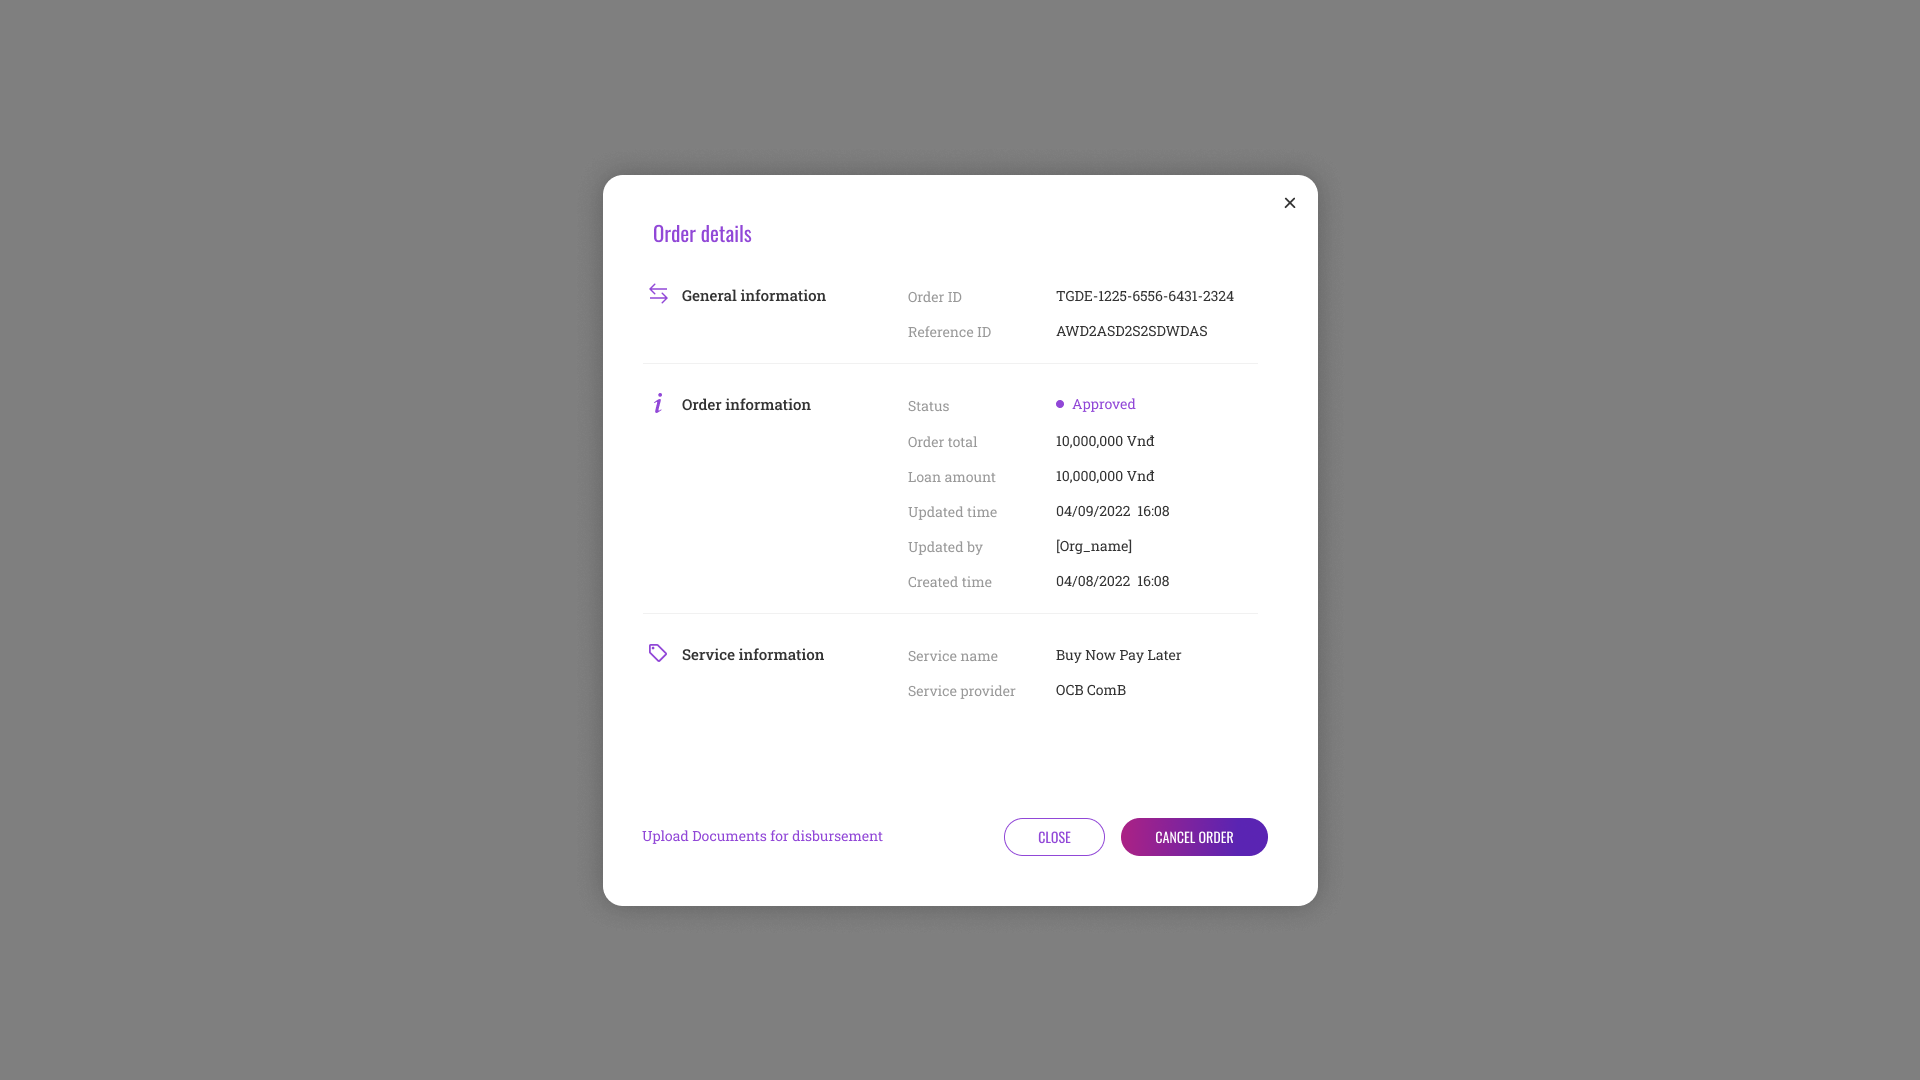
Once uploading documents is done and BNPL provider confirms it's OK, our system will automatically request disbursement.
For some reason if your user wants to cancel a BNPL transaction (Approved order), you can request cancellation on the same popup.
- Instruct users to repay
We do not force users to install another app for BNPL. The users who enjoy BNPL can do everything inside your (Market) platform. We provide a function in SDK for your users to check necessary information.
- Swift
- Kotlin
- React.js
The following function opens BNPL related UI for your users to manage BNPL usage.
class SampleViewContoller: UIViewController {

    ///

    func showBNPLDetail() {
        passport.showDetail(
            from: self,
            user: user,
            marketId: APP_ID,
            productTypes: [.consumerBNPL]
        ) {
            print("page dismissed")
        }
    }
}